
Classic Chocolate Fudge
Ingredients:
- 500g Dairy Milk or Dark Chocolate
- 30g Butter
- 1 Can Condensed Milk
Instructions:
- Prepare a square shallow pan lined with aluminium foil to set the fudge in.
- Break up the chocolate into 2-3 square pieces and melt in a bain-marie (metal bowl over a saucepan boiling with water, water must not touch the chocolate).
- While the chocolate is in the process of melting, add butter and condensed milk.
- Stir regularly until smooth and creamy.
- Pour mixture into the lined dish and place in the fridge to set, for about 2-3 hours.

Poached Pears with Caramel Sauce, Pedro Ximenez Raisins and Honeyed Pecans
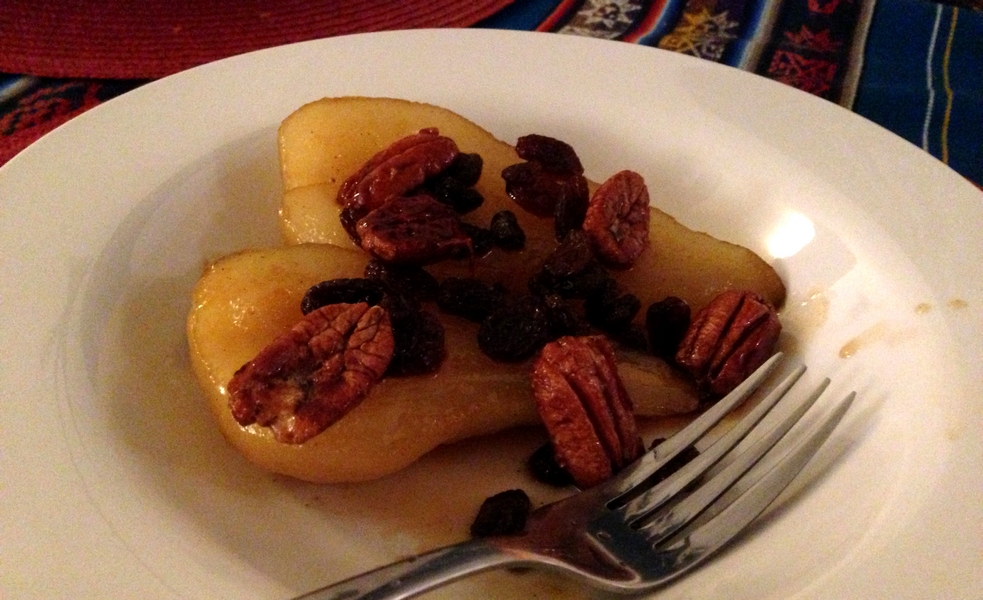
Serves 6.
Ingredients (Honeyed Pecans):
- 60g Honey
- 180g Pecan Nuts
Ingredients (Raisins):
- 100g Moscatel or Golden Raisins
- 60ml Pedro Ximenez Sherry
Ingredients (Poached Pears):
- 600g Sugar
- 2 Lemons, Zest and Juice
- 2 Oranges, Zest and Juice
- 1 tsp Chinese Five-Spice Powder
- 2 Star Anise
- 1 Cinnamon Stick
- 200ml White Wine
- 2 Vanilla Beans, split lengthwise
- 6 Pears, peeled, halved, cored
Ingredients (Caramel):
- 100g Honey
- 50g Brown Sugar
- 30g Butter
- Optional : Mint leaves for serving along with the sauce
Instructions (Raisins):
- Put the sherry in a small saucepan and heat until warmed.
- Add the raisins and stir to combine.
- Remove from the heat and set aside to soak for 1 hour.
Instructions (Honeyed Pecans):
- Preheat oven to 170C and line a baking tray with baking paper.
- Place the honey in a saucepan and heat until boiling.
- Add the pecans to the saucepan and stir to combine.
- Strain the pecans to remove excess honey. Spread pecans out over the baking paper to form one layer.
- Bake for 5 mins then set aside to cool.
Instructions (Poached Pears):
- In a large soup saucepan, combine 2L of water with the sugar, lemon zest and juice, orange zest and juice, five-spice, star anise, cinnamon, wine and vanilla beans. Bring to a boil.
- Prepare the pears and add them to the liquid and cover with a small paper over them within the water so that they remain submerged.
- Reduce to a simmer then cook for 30 mins or until tender.
- Use a slotted spoon to remove the pears.
Instructions (Caramel):
- In a large frying pan, add honey sugar and butter. Heat until melted and combined.
- Bring to a boil. Add the pear halves and toss until coated in the caramel.
- Serve the pears surrounded by the pecans, raisins, extra caramel sauce and garnished with the mint.

Pink Poached Quinces (GF)

Ingredients :
- 2 Large Quinces
- 2 Cups Caster Sugar
- 3 cm Piece of Ginger, sliced
- 1 Rosemary Sprig
- 2 Lemons
Instructions:
- Fill a large bowl to the 3/4 mark with cool water and the juice of 1 lemon.
- Peel and core the quinces, then cut them into thick slices. Transfer them as quickly as possible to the water lemon bath to prevent them from browning.
- Pare the zest from the remaining lemon.
- Combine the sugar, rosemary, ginger and pared lemon zest and juice (everything but the quince) in a medium sized saucepan with 4 cups of water.
- Bring mixture to the boil over high heat, then reduce heat to medium-low.
- Drain quince, then add quince slices to the sugar mixture.
- Simmer gently for 1.5 hours, until tender and rosy pink.
- Turn 1 cup of the poaching liquid into syrup by placing it in a small saucepan (removing all the rosemary, lemon and ginger bits) and simmering to reduce until thickened to form a syrup.
- Store quinces within the poaching liquid in the fridge. Syrup can also be stored in the fridge. Will keep for at least a week.

Lebanese Knafeh (Sweet Cheese Treat)
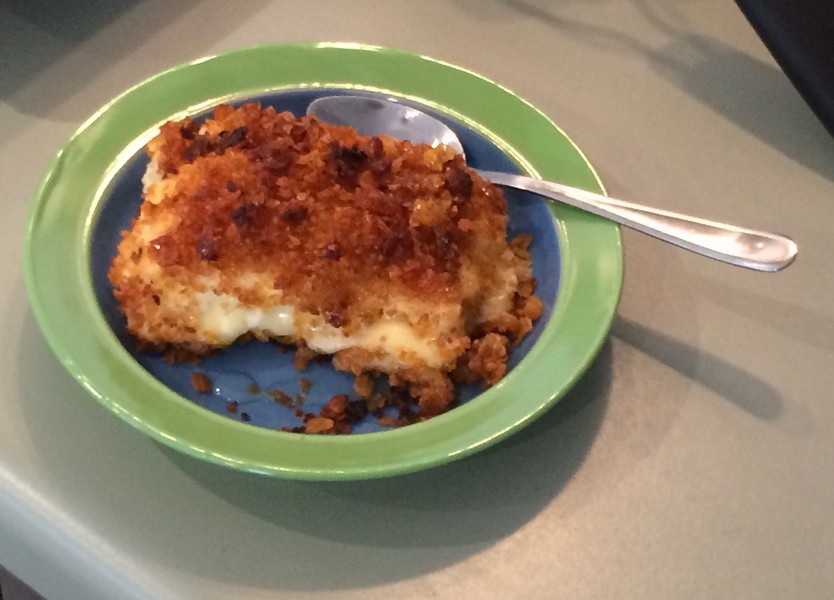
Serves 10
Time : 30 mins Prep + 1 hr Cooking + 6 hrs or overnight Cooling
Ingredients :
- 80g Unsalted Butter, Melted
- 220g Cornflakes, finely crushed
- 2 1/8 Cups Milk
- 1/4 Cup (55g) Caster Sugar
- 45g Fine Semolina
- 300ml Thickened Cream
- 1/2 tbsp Cornflour
- 1/2 tsp Rosewater
- 250g Mozzarella, coarsely grated
- Dried Rose Petals and Chopped Pistachios
Ingredients for the Syrup :
- 1 Cups (220g) Caster Sugar
- 1/4 tsp Lemon Juice
- 1/4 tsp Rosewater
Instructions:
- Prepare a deep square tray, grease tray and line base with baking paper.
- In a medium-sized bowl, mix melted butter and crushed cornflakes until they are fully coated.
- Press half the mixture evenly across the base of the tray. Set aside in the fridge to chill.
- In a large saucepan, prepare the filling by heating up milk, sugar, semolina, cream plus the cornflour diluted in 1 tbsp of warm water. Stir constantly for 12 mins or until thick. Remove from heat and stir in rosewater. Set aside to cool for 30 mins.
- Meanwhile preheat the oven to 180C.
- Spoon half the filling on top of the cornflake base.
- Scatter grated mozzarella on top.
- Spoon the remaining filling on top of mozzarella.
- Scatter the remaining cornflakes on top of the mixture.
- Bake for 25 mins or until it's starting to bubble around the edges.
- Allow to cool for 1 hour on the counter then place it in the fridge to chill for at least 6 hours, preferably overnight.
- Note : You can make the syrup the night before serving as it keeps well.
- To make syrup, place sugar in a saucepan with 125ml (1/2 Cup) water over medium heat, stirring to dissolve sugar. Bring to a simmer and cook for 8 mins until thickened. Remove from heat and allow the syrup to cool completely.
- Preheat oven to 200C. Cut knafeh into squares. Place knafeh squares separately onto a lined baking tray.
- Bake for 10 mins until the cheese just starts to melt.
- Serve warm with rosewater syrup and scattered rose petals and pistachios.

Oven-Roasted Candied Quinces
Great as a candied treat with ice cream, mascarpone or creme fraiche
Serves 8
Prep Time : 30 mins
Cooking Time : 3 - 4 hours
Total Time : 3.5 - 4.5 hours
Ingredients:
- 1kg Caster Sugar
- 5 Quinces
- 1L Water
Instructions:
- In a large saucepan, mix in the water and sugar until combined.
- One at a time, peel the quince, remove seeds and cut into 6 slices. Warning : Quinces can be very hard to cut.
- Place slices into the sugar water in the saucepan.
- Repeat with remaining quinces.
- Once all the quinces are in the pan, set heat to high and boil the mixture until the quinces turn pink and the liquid becomes thick (about 1 hour or more)
- About 15 mins before the quinces are done, preheat the oven to 200C and prepare a roasting tray lined with foil paper.
- Place the quince slices, standing up as much as possible, across the roasting tin.
- Pour over a bit of the remaining syrup from the pan until about 1cm deep in the roasting pan.
- Place roasting pan in the oven for about 1 hour.
- Turn oven heat down to 160C and bake for another 2-3 hours, basting and turning regularly so that the quinces caramelise on all sides.
- Remove from oven and serve with ice cream, mascarpone or creme fraiche.

BBQ Grilled Pineapple Skewers with Bourbon and Brown Sugar Glaze
Makes a minimum of 4 pineapple skewers.
Ingredients:
- 1/2 Pineapple, cut into 3cm pieces
- 4-8 Bamboo Skewers, soaked in water for 1 hour
- 125ml Bourbon Whiskey
- 1/2 Cup Brown Sugar
- 1 tsp Vanilla Extract
- 1/4 tsp Cinnamon
- Ice Cream, to serve (optional)
Instructions:
- In a small saucepan, over medium heat, simmer bourbon, sugar, vanilla and cinnamon until sugar dissolves. Set aside.
- Thread pineapple chunks onto 4 or more skewers
- Heat BBQ grill. Grill pineapple skewers until brown, basting repeatedly with bourbon glaze, and turning occasionally, about 6-8 mins.

Sous Vide Strawberries and Coconut Sugar
Ingredients:
- 1 punnet strawberries, hulled (or also very good with cherries, without stems and without sugar)
- 1-2 tbsp coconut sugar
- 1 tbsp water
Instructions:
- 60 degrees Celcius for 25 mins.

Flaming Tropical Pineapple & Banana Foster
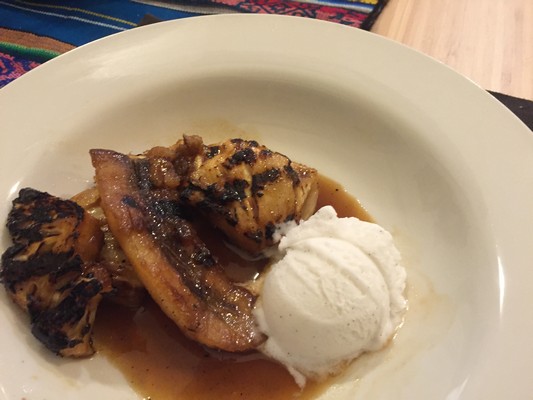
The big flames makes for a fantastic presentation!
Serves 4
Ingredients:
- 2 Bananas, unpeeled, halved lenghways then halved cross ways to make 4 long segments
- 2 slices Fresh Pineapple (about 1cm thick, peeled, halved and cored)
- 2 tbsp Vegetable Oil
- 115g soft Dark Brown Sugar
- 60g Butter
- 1/4 tsp Cinnamon
- 60ml Banana or Butterscotch Liqueur
- 120ml Dark & Spiced Rum (next time try a little less say 100ml. Using 120ml seemed more than necessary.)
- 1 Lime, cut in half
- Ice Cream, for serving (optional)
- 30g Toasted Flaked Coconut (optional)
Special Equipment:
- BBQ - Gas or charcoal grill
Instructions:
- Preheat the grill to medium-low
- Lightly rub oil on the pineapple and banana slices.
- Place the pineapple and bananas segments, cut side down, on the grill.
- Cook for about 2 mins per side, until the bananas are golden and the pineapple slices have light grill marks.
- Set aside to cool. Peel the bananas when they are cool enough to handle.
- Meanwhile, in a large frying pan, over medium heat, cook the brown sugar, butter and cinnamon until very hot.
- Add the grilled pineapple slices an peeled bananas, turning to coat with the syrup.
- Gently mix in the liqueur and rum. When the mixture starts to boil, carefully touch the surface of the syrup with a lit long stem match. There will be quite a bit of flames and they will continue for up to 5 minutes.
- Baste the fruit with the flaming syrup until the flames die out.
- Immediately, squeeze the lime halves over the frying pan.
- Serve the hot fruit and syrup immediately, with ice cream. Sprinkle with coconut flakes and serve.

Sous Vide Banana Rum Raisin

Ingredients:
- 1 Banana, sliced
- 1 tbsp Coconut Sugar
- 2 tbsp Rum
- 1/4 cup Raisins
Instructions:
- Place all the ingredients in a sous-vide plastic bag. Vaccuum seal the bag.
- In a vat of water heated to 60 degrees Celcius with a sous vide water heater such as a Joule.
- Cook at this temperature for 25 mins. Serve warm.

Sticky Bananas with Brown Sugar & Lime
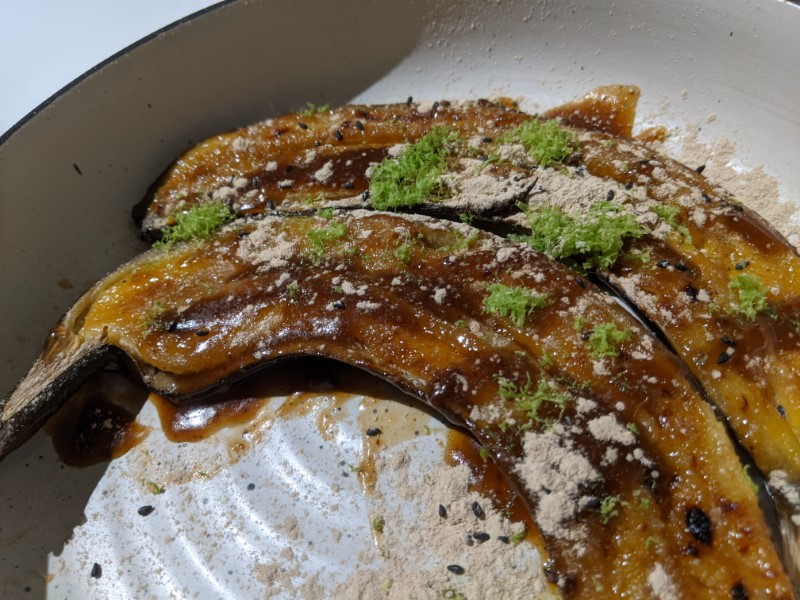
Ingredients:
- 40g Unsalted Butter
- 70g Light Brown Sugar
- 1/2 tsp Ground Star Anise
- 150g Creme Fraiche
- 1.5 tbsp White Miso
- 2 Semi-ripe Bananas
- 1 Lime, zest finely grated
- 2 tsp Black sesame seeds, toasted
Instructions:
- Set the oven to grill.
- In a large ovenproof pan, over medium heat, combine butter, sugar, star anise and a tbsp creme fraiche.
- Stir the mixture until the butter has melted and the sugar dissolved.
- Then take it off the heat and whisk in the miso until smooth.
- Add the bananas cut side-up, and using a spoon, coat the tops of the bananas with some of the caramel.
- Transfer the pan to the oven and grill for approx eight minutes or until the bananas have softened and taken on quite a lot of colour.
- Sprinkle overtop the bananas with lime zest and toasted black sesame seeds.
- Serve hot straight from the pan, with lime wedges and remaining creme fraiche.
Source : Ottolenghi https://www.theguardian.com/food/2019/jul/27/yotam-ottolenghi-miso-recipes-gochujang-eggs-leeks-sticky-bananas (Adapted slightly)

Japanese Mochi with Sweet Red Bean Filling
Ingredients for the Dough:
- 220g Glutinous Rice Flour
- 110g Sugar
- 200ml Coconut Milk (or milk if you have to)
- 1/2-1 Cup Desiccated Coconut or Toasted Sesame or Glutinous Rice Flour, to cover the mochi
Ingredients for the Red Bean Filling:
- 1/2 Cups Red Beans
- 1.5 Cup Boiling Water
- Approx 3/4 Cup Rock Sugar, to taste
Instructions:
- Make the paste : Soak the red beans for 3 hours. Drain well.
- Add into the boiling water and simmer over low heat, with cover until soft.
- When half the water is gone, add rock sugar to taste.
- When the beans become soft but can still retain their shape, they are ready. Don't forget to taste them to ensure that the mixture is sweet enough (if not, add more rock sugar).
- Set aside to cool, then puree mixture.
- Make the dough : Combine the glutinous rice flour with sugar. Blend well.
- Gradually stir in coconut milk until smooth.
- Transfer the dough mixture into a very shallow bowl (preferably) or plate - The shallower the plate, the faster the dough will cook through.
- Steam over high heat, covered, for 30mins, or until cooked through (when mixture is translucent). Or try inserting a chopstick - if it comes out without too much of the dough, it is ready. Remove and set aside to cool 5-10 mins.
- Cut away small pieces of dough, enough to knead the dough into a small flat disc of about 4 inches in diameter and about 5mm thick.
- Spoon the red bean puree in the middle. Fold the edge to seal the mochi into a ball shape.
- Lightly roll the mochi ball into dessicated coconut, or toasted sesame seeds or toasted glutinous rice flour. And they are ready to eat!
- (If using the glutinous rice flour, you must cook the rice flour first by spreading it evenly on a cookie tray and toasting it in the oven for about 3-5 mins until aromatic. Do not let it burn. Let it cool before use.)

Nashi Pear Fritters with Spiced Cream

Recipe can be made with any fruit
Serves 6 (with about 2-3 slices each).
Ingredients:
- Vegetable Oil for frying
- 2-3 Nashi Pears, cored and sliced 1cm thick
- Icing Sugar, for dusting
- Golden Syrup, for serving
Ingredients (Batter):
- 150g Self Raising Flour, sifted
- 1/2 tsp Baking Powder
- 1/2 tsp Ground Cinnamon
- 250ml Chilled Water
Ingredients (Spiced Cream):
- 300ml Thickened Cream
- 1 tbsp Golden Syrup
- 1/2 tsp Ground Cinnamon
- 1/4 tsp Ground Star Anise
Instructions:
- Prepare spiced cream first. In a large bowl, combine cream, syrup, cinnamon and star anise. Beat cream until soft peaks form. Cover and chill in the fridge until you are ready to serve.
- For the batter, in a large bowl, combine the sifted flour, baking powder and cinnamon. Whisk in the water to form a thin batter.
- Prepare a wok with hot oil for frying, Heat to 180C.
- Dip a nashi slice into the batter, coating well. Place coated nashi slice into the hot oil.
- Cook 2-3 slices concurrently. Fry them for 1-2 mins on each side until golden.
- Using a slotted spoon, transfer them from the oil to a baking rack to drain.
- Repeat with remaining slices.
- Dust fritters with icing sugar. Serve them hot with the spiced cream and extra syrup.

French Canadian 'Sucre a la creme' (For those with a very sweet tooth)
Ingredients:
- 2 cups (or 6 oz.) of 2% Evaporated Milk
- 2 cups of brown sugar
- 5 tablespoons of butter
- 2 tablespoons of maple syrop or peanut butter (peanut butter is soo good!)
- 2 cups of icing sugar
Instructions:
- Mix in a saucepan the milk, sugar, butter and chosen flavouring (peanut or maple)
- Heat to boil
- Remove from the heating element, add icing sugar
- Mix well until it is smooth (with no sugar clumps)
- Pour in a greased (with Cisco) pan (at least 1" deep)
- Cover with aluminum foil and place in freezer for at least an hour
- Serve cold and in brownie pieces

Cinnamon-Spice Caramel Fudge
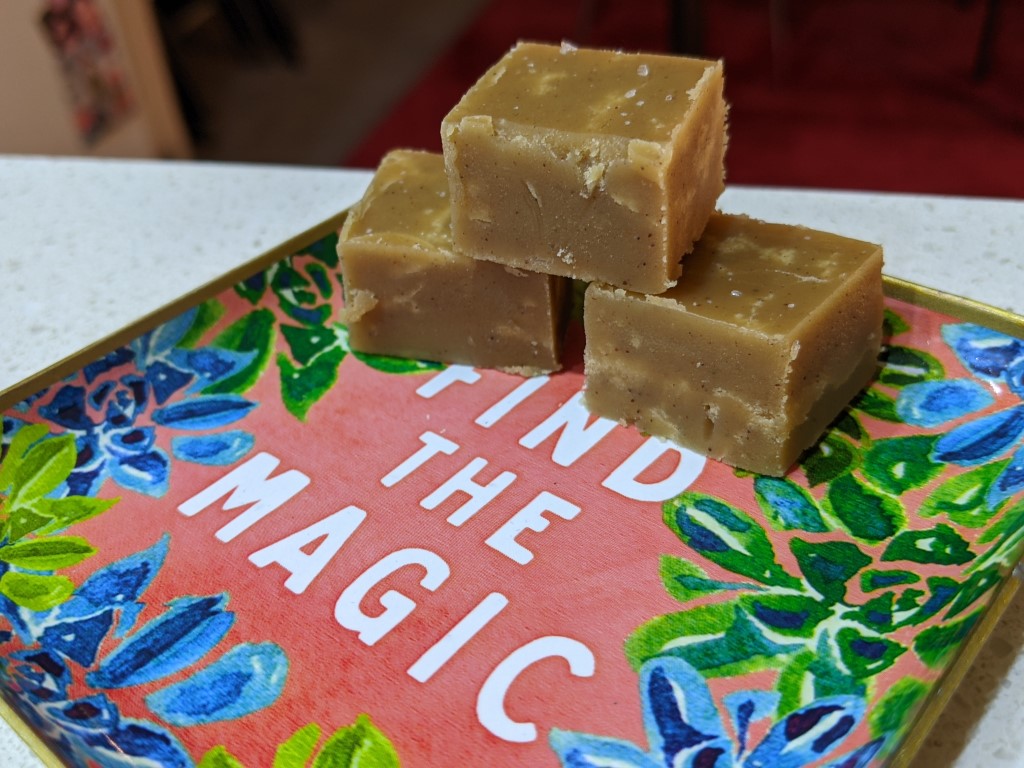
Really good. Makes 1 x 23x23cm tin.
Ingredients:
- 100g butter
- 550g demerara sugar
- 200g golden syrup
- 350ml double cream
- 1 tsp vanilla extract
- 2 tbsp cinnamon
- 1/4-1/2 tsp sea salt flakes
Instructions:
- Melt the butter, sugar and syrup and cream in a medium, high-sided heavy-based pan, stirring until the sugar has dissolved. Line a tin about 23x23cm with greaseproof paper.
- Bring to a simmer over a medium-low heat without stirring and cook, stirring occasionally until it reaches 116C, stirring more regularly after it reaches 100C and turning down the heat if it begins to catch.
- Take off the heat and beat in the vanilla, cinnamon and salt with a wooden spoon, then continue beating until the fudge has thickened and lost its shine. Pour into the tin and leave to set.
- Once it’s firmed up a little, after about an hour, slice into squares and leave to cool completely. Best kept refrigerated.
Source : https://www.theguardian.com/lifeandstyle/2015/jun/11/how-to-make-the-perfect-fudge-felicity-cloake. Minor alterations made (Cinnamon added).

Canadian Maple-Pecan Fudge
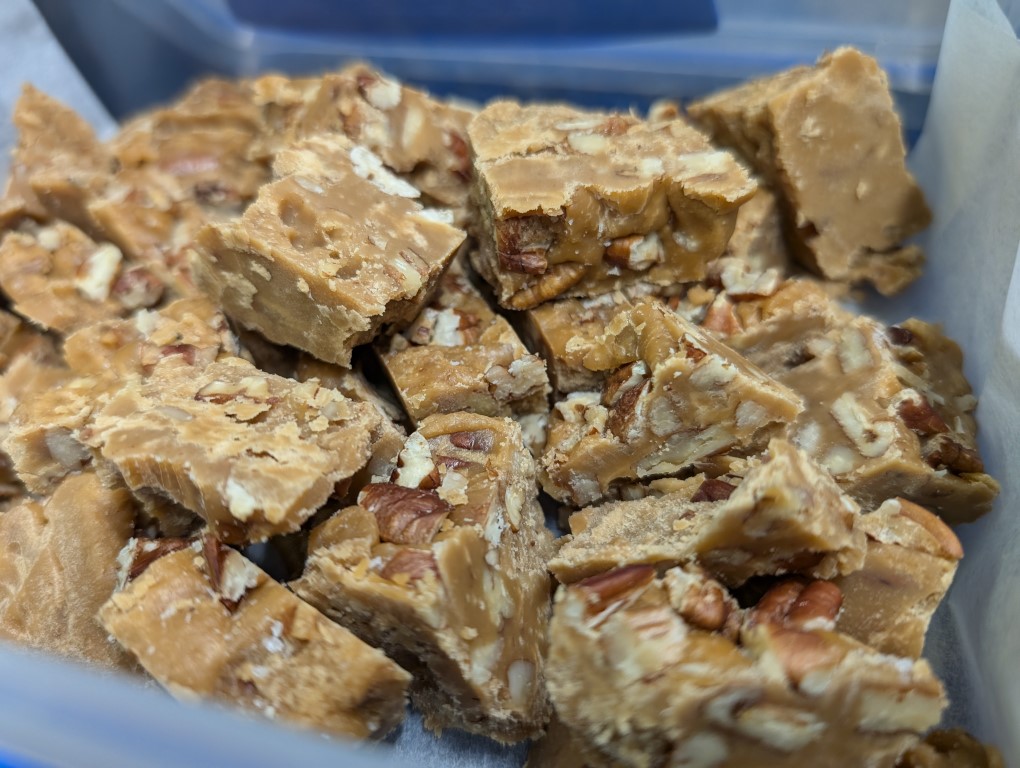
Total Time : 1.5 hours (plus chilling). Makes about 1 pound.
Crystallised and not chewy and supposedly that is what this fudge is meant to be. Good temperature directions for fudge. Also it tasted beautifully buttery despite no butter.
Ingredients:
- 1 cup pecans, roasted and chopped
- 2 cups pure maple syrup
- 1 cups heavy cream
- 1/2 teaspoon kosher salt
Special Equipment:
- A candy thermometer
- a 9x5" or 8x4" loaf pan
Instructions:
- Preheat oven to 350F. Toast pecans on a rimmed baking sheet, tossing once, until fragrant and slightly darkened, 10–15 minutes. Let cool, then coarsely chop.
- Meanwhile, butter loaf pan. Attach candy thermometer to a large heavy-bottomed pot or Dutch oven set over medium heat. Cook maple syrup, cream, and salt, whisking constantly, and bring to a boil. Stop whisking and continue to boil until thermometer registers 238F / 114C, about 40 minutes. Immediately remove from heat and let cool to 130F / 54C, about 40 minutes.
- Prep your pan and have it ready to pour in the fudge quickly.
- Then mix heavily with a wooden spoon about 3-4 mins, towards getting a stiff and opaque fudge. Warning: Adding pecans stiffened up the fudge super quickly, within seconds. So I would fold in chopped pecans early,
- Scrape fudge into prepared pan; smooth surface.
- Chill until cool and firm, at least 2 hours, if not a bit more.
- The fudge will fall apart more easily when it is not yet fully cooled.
Source : https://www.epicurious.com/recipes/food/views/maple-pecan-fudge Halved the recipe only.

Chocolate Peanut Butter Truffles - Alt Recipe (Mom's)
No-Bake. Prep time: 30 MINS. Cook time: 0 MINS. Total time: 30 MINUTES. Yield: 20-22.
Ingredients:
- 1/2 cup (135g) creamy peanut butter (not natural because it’s too greasy to work with)
- 3 tbsp (42g) unsalted butter, softened
- 1 cup (125g) powdered sugar, sifted
- 8 oz dark or semi-sweet baking chocolate
Instructions:
- Mix together the peanut butter, butter and powdered sugar until combined.
- Roll the mixture into 1″ balls and place in a freezer-safe container lined with wax paper. Chill the dough if it’s too soft to roll – If the dough is too soft or sticky to easily roll in your hands, pop it in the fridge for 20-30 minutes to firm up.
- Cover and chill in the freezer for 1 hour. Freezing the balls before dipping in chocolate really helps the peanut butter balls hold their shape when dipping in the warm chocolate. It also helps the chocolate set up faster.
- Melt the chocolate in the microwave at 50% power in 30-second increments, stirring in between, until completely smooth and melted. Take out from the microwave prior to all the chocolate melts and then stir until everything is just melted.
- Dip the peanut butter balls, one at a time, in the melted chocolate using a small fork. Tap the fork on the side of the bowl a few times to let the excess chocolate drip off, so it doesn’t pool on the bottom when you place the balls to set. Use a toothpick to help slide the balls off the fork.
- Set the balls on wax paper and drizzle with the excess chocolate if desired. Place in the fridge for 10-15 minutes until the chocolate hardens.
- The peanut butter balls can be stored in an airtight container at room temperature for 2-3 days or in the fridge for up to 2 weeks. They can also be frozen for up to 3 months.
Source : https://www.littlesweetbaker.com/peanut-butter-balls/. No alternations made.

Chocolate Peanut Butter Truffles
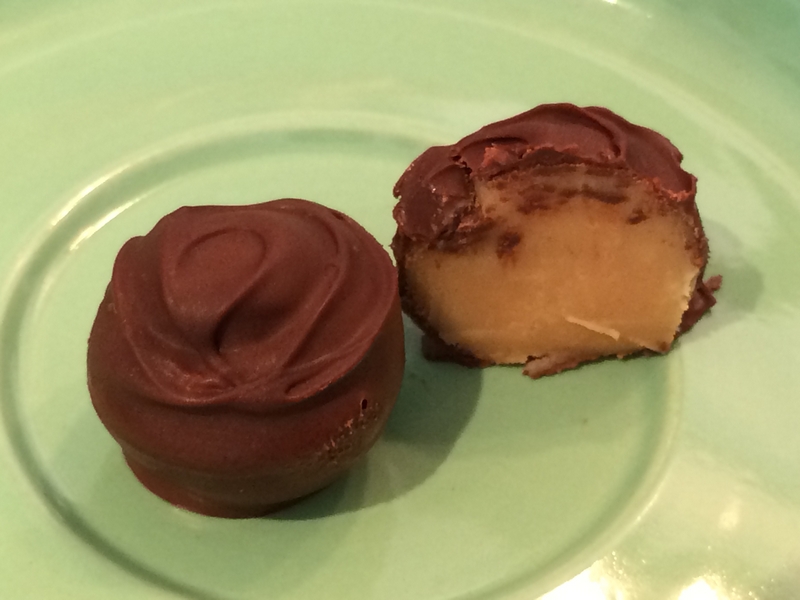
Amazingly taste just like Reese Pieces Cups!
Makes 34
Prep = 25 mins. Chilling Time = 4 hours.
Ingredients:
- 180g White Chocolate, roughly broken
- 3/4 cup Crunchy Peanut Butter
- 1/3 cup Thickened Cream
- 1/2 tsp Salt
- 200g Dark Chocolate, roughly broken
- 50g Milk Chocolate, roughly broken (optional for decoration)
Instructions:
- In a microwave safe medium sized bowl, place white chocolate, peanut butter and cream.
- Microwave for 30 seconds. Then check if melted. If half melted, stir until smooth. Otherwise, place in microwave for another 20 seconds. Repeat stirred to a smooth mixture.
- Stir in salt and refrigerate for 3 hours, until firm.
- Line a tray with baking paper. Using a teaspoon, roll about 1/2 - 1 tsp of mixture into a ball (these truffles are potent so keep the peanut butter balls small). Place these on the tray and chill for at least 30 mins.
- 10 mins before the peanut butter balls are ready, heat up dark chocolate in a microwave safe small bowl (for dipping the truffles).
- Microwave for 30 seconds. Then check if HALF melted. If so, take out bowl and stir until smooth. Otherwise, place in microwave for another 20 seconds. Repeat until half melted and stirred to a smooth mixture.
- Using a truffle spoon or fork, dip the peanut butter ball into the now-cooler-but-still-liquid dark chocolate.
- Ensure they are fully covered in chocolate then remove from the chocolate bowl and shake off excess chocolate (sometimes you need to wait for as much as 20-30 seconds until all excess chocolate drips off - trust me, it's worth waiting).
- Return truffles to the baking paper lined tray and once the tray is full, refrigerate for at least 10-15 minutes to set.
- Optional decoration: Melt milk chocolate in an microwave safe bowl until half melted then stir to smoothen mixture. Spoon chocolate in the corner of a ziploc or sandwich plastic bag. Snip off a tiny bit of the corner to make a small hole and pipe lines on the dark chocolate truffles. Refrigerate until set, about 10-15 more mins.

Christmas Candy Cane Truffles
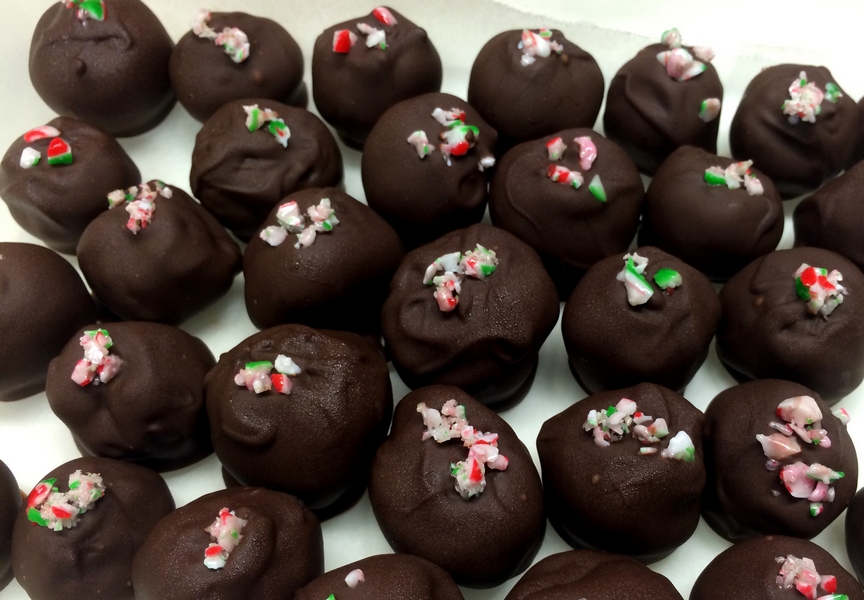
Makes 30 truffles.
Ingredients:
- 10 Candy Canes
- 300g Cream Filled Chocolate Biscuits (eg. Oreos)
- 200g Dark Chocolate, melted
- 2 tsp Vanilla Extract
- 1/3 Cup (80ml) Pure Cream
- 200g Dark Chocolate, for coating
Instructions:
- Place the candy canes in a food processor and process until nearly ground. Sift out 3 tbsp of the larger chunks and set aside in a small bowl. For any chunks larger than 3mm, process again until smaller. In a larger bowl set aside the rest of the candy cane pieces.
- In the empty food processor, process the cream biscuits until finely ground. Put mixture in a medium sized mixing bowl.
- Add the melted dark chocolate and vanilla. Mix well.
- Add the cream and mix until combined. Then add in the larger bowl of candy cane pieces and blend until just combined.
- Refrigerate for 15mins or until firm.
- Roll tablespoons of the mixture into balls and refrigerate for a further 15 mins.
- Meanwhile prepare the chocolate by placing the dark chocolate into a small bowl and microwave for 30 seconds. If half melted, take out of the microwave and stir until fully melted. If not ready yet, return to the microwave for another 10 seconds, or as needed.. keep monitoring for the half melted point.
- Dip into the cooled melted chocolate (ideally with a truffle spoon or fork), let the excess chocolate drip off and place on a baking sheet.
- Before moving on to the next truffle, sprinkle a little bit of the remaining crushed candy cane pieces on the top of the chocolate truffle for decoration.
- Continue with remaining truffles then refrigerate for at least 1 hour.

Amaretto Truffles
Makes 1 dozen
Ingredients:
- 100g Milk Chocolate
- 3 tsp Double Cream
- 1 Egg Yolk, lightly beaten
- 10g Butter
- 2 tsp Amaretto
- 35g Amaretti Biscuits, lightly crushed
- 100g Milk Chocolate, for coating
- 2 tbsp of Almond Flakes, slightly crushed
Instructions:
- Melt 100g of the milk chocolate (30 seconds in the microwave).
- Warm the cream and pour it over the egg yolk, whisking the two quickly (careful that the cream is not too hot as we just want to pasteurise the egg).
- Add the butter and Amaretto to the warm cream mixture. Do not melt the butter first.
- Add the melted chocolate and stir well.
- Fold in the lightly crushed biscuits gently, so as not to break them further. Leave in the fridge until set for at least 30 mins.
- When set, scoop out pieces between the size of a macadamian nut and a walnut. Use your fingers and thumbs to make a ball (as the palm of your hand is too warm).
- Leave to set on a baking paper-lined tray in the fridge for 30 mins.
- Temper the remainder of the milk chocolate for dipping and roll the truffles around in your chocolate covered fingers to coat them.
- Tempered Chocolate: Place the chocolate into a small bowl and microwave for 30 seconds. If half melted, take out of the microwave and stir until fully melted. If not ready yet, return to the microwave for another 10 seconds, or as needed... keep monitoring for the half melted point. This is your tempered chocolate for coating.
- Place a few crushed almond flakes on top of each truffle for decoration. Let sit in the fridge for at least 15mins before serving to set.
- Store in the fridge for up to a few weeks.

Praline Truffles
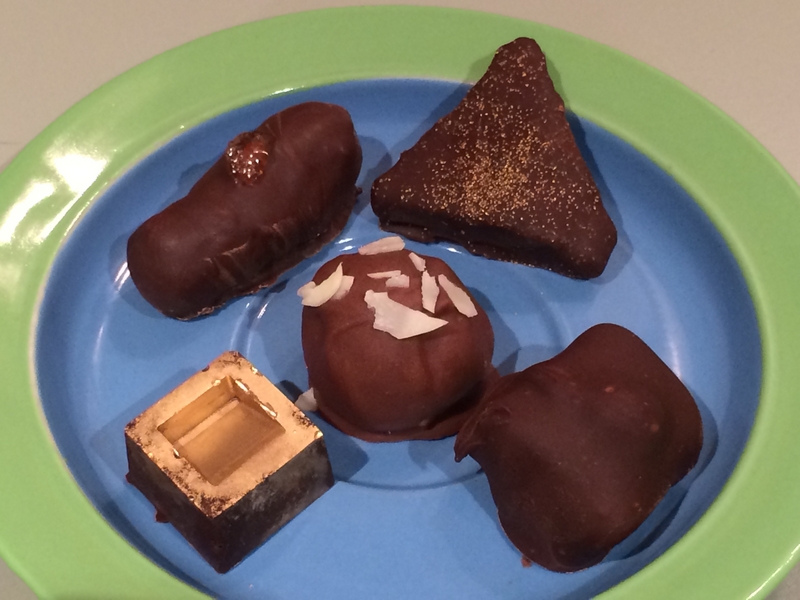
Delicious and beautiful crunchy texture
Makes 3 dozen truffles
Recipe will need to be started 1 day ahead of serving.
Ingredients:
- 200g Milk Chocolate
- 60ml Cream
- 100g Hazelnuts, roasted
- 2 cups (480g) Caster Sugar
- 1/2 cup Water
- 1 tbsp Glucose Syrup
- 200g Dark Chocolate, for coating
Instructions:
- Heat up cream and pour over chocolate place in a medium sized bowl. Leave for a minute then stir until smooth. Set aside.
- Spread your roasted hazelnuts onto some baking paper in a lipped baking tray. Set aside.
- In a saucepan, heat up the sugar, water and glucose syrup.
- Stir the sugar until it is dissolved, then leave it to bubble until it starts to go golden. If sugar crystals start forming on the edges, use a wet pastry brush to wash them down.
- Once golden, immediately pour it over the hazelnuts and leave it to cool completely.
- Once cooled, break up the praline and place it in a strong bag. Smash it with a rolling pin, then process the remainder until you have a mix of coarse and small praline crumb.
- Filter out 3 tbsp of large praline pieces for decoration.
- Mix remainder of the praline into the chocolate mixture. And stir well. Cover with plastic wrap and leave in the fridge overnight to firm up.
- Then take spoonfuls and roll into balls or short logs. Return to the fridge for 15 mins to harden.
- Dip the ganache pieces into tempered chocolate to coat, shaking off the excess chocolate before placing them on a tray lined with baking paper.
- Tempered Chocolate: Place the dark chocolate into a small bowl and microwave for 30 seconds. If half melted, take out of the microwave and stir until fully melted. If not ready yet, return to the microwave for another 10 seconds, or as needed.. keep monitoring for the half melted point. This is your tempered chocolate for coating.
- Place a few pieces of the praline on top of each truffle for decoration. Let sit in the fridge for at least 15mins before serving to set.
- Store in the fridge for up to a few weeks.

Hazelnut & Nutella Truffles
Makes 2 dozen truffles.
Ingredients:
- 180g Nutella + extra to decorate
- 30 Hazelnuts + 10 extra, toasted and skin removed
- 200g Dark Chocolate, for coating
Instructions:
- In a shallow small rectangle or square pan (or preferably a silicone truffle mould!), cover the bottom and sides with plastic wrap, removing any air pockets between the wrap and the container.
- Spoon out the nutella across the full bottom of the container (nutella should be at least 1.5-2cm in thickness).
- Place a full roasted hazelnut in the nutella in the top right corner (1 cm away from the edges). Press down until only half the hazelnut is visible.
- Continue dotting the nutella with roasted hazelnuts, in a gridlike pattern with approx 2.5cm between each nut, so that they can be cut into squares for the truffles.
- Place in the freezer overnight.
- Crush the 10 extra roasted hazelnuts into smaller pieces and set aside.
- Remove nutella by pulling on the plastic wrap. Then use a hot knife to cut nutella slab into squares.
- Meanwhile prepare the chocolate by placing the dark chocolate into a small bowl and microwave for 30 seconds. If half melted, take out of the microwave and stir until fully melted. If not ready yet, return to the microwave for another 10 seconds, or as needed.. keep monitoring for the half melted point. This is your tempered chocolate for coating.
- Quickly dip the frozen nutella squares into tempered chocolate until it is completely covered, remove from the chocolate and shake off the excess before placing it on a tray lined with baking paper.
- Sprinkle some of the extra crushed hazelnut bits on top of the truffles before they set.
- Finish all remaining truffles and let set in the fridge for at least 30 mins. Dab each with a tiny bit of nutella on top of the bump from the hazelnut for decoration.
- Keep truffles cold as nutella will melt.

Caramelised Coconut Truffles
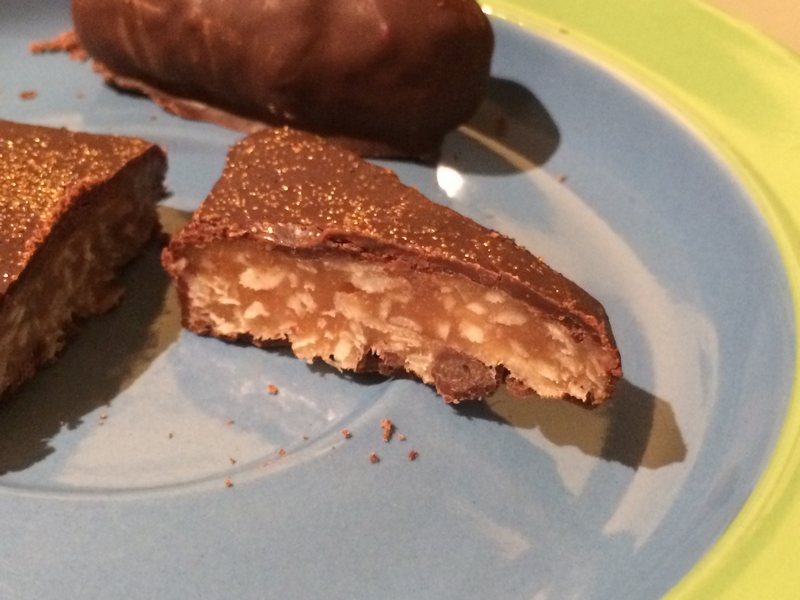
Makes 3-4 dozen truffles
Ingredients:
- 2 tbsp Glucose Syrup
- 1 1/4 cups (300g) Caster Sugar
- 75ml Water
- 1/2 cup Coconut Milk
- 1/2 cup Cream
- 25g Butter Chopped
- 3 cups (255g) Desiccated Coconut + extra for decoration
- 400g Dark or Milk Chocolate for Coating
Instructions:
- In a saucepan, mix sugar, glucose syrup and water over high heat, stirring until the sugar has dissolved.
- Once dissolved, leave the mixture unstirred in the pan until the syrup starts to turn golden (approx 185C).
If sugar crystals start forming on the edges, use a wet pastry brush to wash them down.
- Once golden, stir in your cream, coconut milk and butter. Caution : Hot steam will rise suddenly so stand back and stir until smooth.
- Add a candy thermometer to the side of the pan and heat witout stirring until it reaches 110C.
- Remove from the heat and stir in your coconut.
- Line a baking tray with baking paper, covering the edges, and pour in the coconut mixture to an even 2-2.5cm height.
- Once cooled at room temperature, remove from the tin and cut into long 1" wide slices and use two knives to shape it into a pointy triangular pyramid shape (like a toblerone bar).
- Refrigerate for 1 hour.
- Then 10 mins before they are ready, prepare your tempered chocolate.
- Tempered Chocolate: Place the dark chocolate into a small bowl and microwave for 30 seconds. If half melted, take out of the microwave and stir until fully melted. If not ready yet, return to the microwave for another 10 seconds, or as needed.. keep monitoring for the half melted point. This is your tempered chocolate for coating.
- Then slice coconut into small bite sized triangles, about 1cm thick and dip them into the tempered chocolate, shaking off the excess chocolate before placing them on a tray lined with baking paper.
- Sprinkle the top of each truffle with some coconut or coloured sprinkles for decoration.
- Let sit in the fridge for at least 15mins before serving to set.
- Store in the fridge for up to a few weeks.

Whisky Maple & Walnut Chocolate Truffles
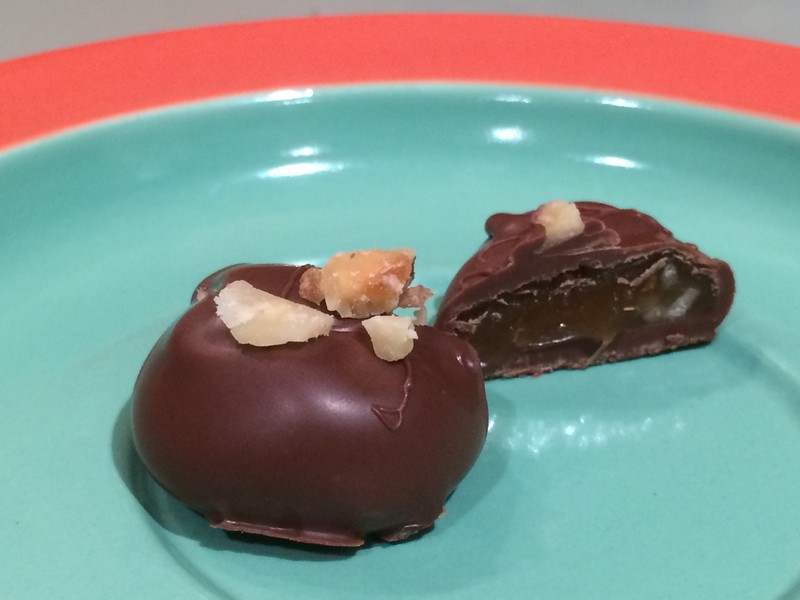
Difficulty : Medium - High (as caramels keep softening)
Makes 2 dozen truffles
Ingredients:
- 1 Cup Maple Syrup
- 1/4 Cup Thickened Cream
- 1/4 Cup Skim Milk (Australian Skim Milk)
- 1/4 Cup Walnuts, roasted and chopped finely (but not ground)
- 3/4 tbsp. Whiskey (no more as it will affect the caramel consistency)
- 1 tbsp Vegetable Oil
- 200g Dark Chocolate
Instructions:
- In a saucepan, boil maple syrup, cream and skim milk with a candy thermometer until it reaches the point in between soft ball and hard ball stages, at 216 C.
- Then remove from heat and mix in the whiskey and roasted chopped nuts.
- Let set in the fridge for 30 mins to harden, then make marble sized balls (as small as possible) and return to the freezer for 30 mins to harden.
- Prepare tempered dark chocolate by melting half the chocolate in the microwave and letting the rest of the chocolate melt naturally. Mix to encourage melting. Chocolate should return to room temperature just as the last piece of chocolate is melted. If still hot, add more chocolate until the chocolate no longer melts.
- Use dipping fork to dip caramel balls into the tempered chocolate and set aside. Place in the fridge as soon as possible to keep the truffles from melting.
- Store in the fridge. Will keep for at least a week.

Popping Candy Chocolate Truffles
Level of Difficulty : Easy
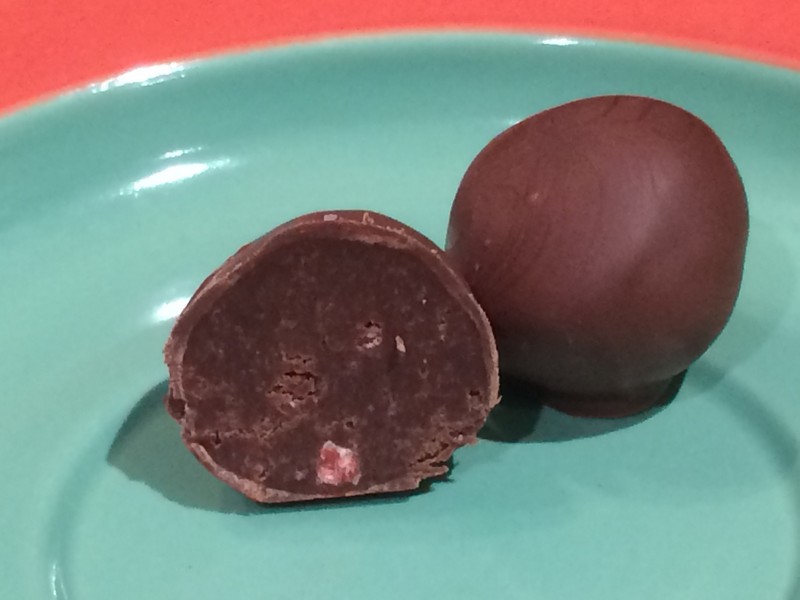
Ingredients:
- 100g Milk Chocolate
- 100g + 200g Dark Chocolate
- 1/3 Cup Thickened Cream
- 18 Tiny Packages of Popping Candy (any flavour, adjust more or less as desired)
Instructions:
- Prepare the ganache by heating up cream to just before boiling.
- Then pour the hot cream in a medium bowl on milk chocolate and 100g dark chocolate.
- The mixture should turn into a ganache. Let the ganache cool for 30 mins and then mix in popping candy. Place in the fridge for at least 30 mins to harden.
- Make small spoonfuls of ganache into spheres and return these spheres to the fridge for 30 mins.
- Prepare tempered dark chocolate by melting half the chocolate in the microwave and letting the rest of the chocolate melt naturally. Mix to encourage melting. Chocolate should return to room temperature just as the last piece of chocolate is melted. If still hot, add more chocolate until the chocolate no longer melts.
- Use dipping fork to dip ganache balls into the tempered chocolate and set aside.
- Store in the fridge. Will keep for at least a week.

Coconut Snowball Truffles with Hidden Red Velvet
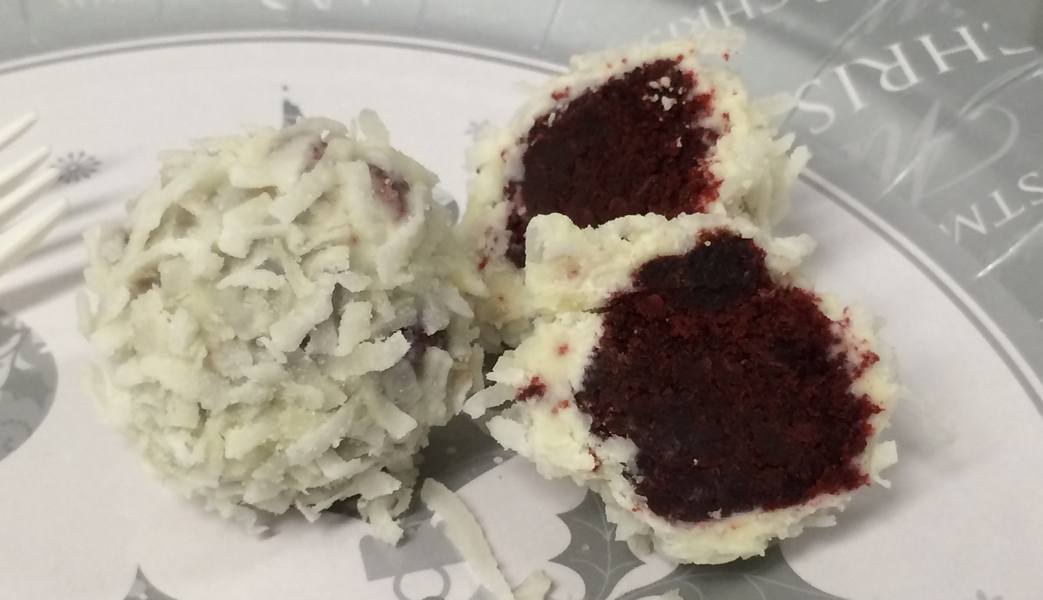
Makes 2-3 dozen.
Ingredients:
- 150g Unsalted Butter, softened
- 3/4 cup (165g) Self Raising Flour, sifted
- 1 tsp Vanilla Extract
- 2 Eggs
- 1 1/4 Cup (25g) Cocoa Powder
- 1/2 cup (125ml) Buttermilk
- 2 tbsp Red Food Colouring
- 1/4 Cup (20g) Dessicated Coconut
- 1/4 Cup (60ml) Coconut Flavoured Liqueur
- 300g White Chocolate, roughly broken
- 3 tsp Vegetable Oil
- 2 Cups (150g) Moist Coconut Flakes, finely chopped in a food processor
Instructions:
- Preheat oven to 160C.
- In a large bowl, combine butter, vanilla and sugar. Beat until light and creamy, for about 8 mins.
- Add the eggs, one at a time, beating well after each addition.
- Add the sifted flour, cocoa, buttermilk, red food colouring, and mix until just combined.
- Grease a square 20x30cm cake tin and line with baking paper.
- Pour the mixture into the prepared tin and use a knife to ensure the mixture is level.
- Bake for 40-45mins or until a toothpick comes out clean.
- Remove from the oven, cool in the pan for 10 mins then invert the cake over a wire rack and cool completely.
- Once cooled, place the cake in the food processor add the dessicated coconut and coconut liqueur and process until combined.
- Roll tablespoons of the balls and refrigerate for 30 mins or until firm.
- Place the chocolate and oil in a heatproof microwave safe bowl and heat until mixture is half melted. Once half melted, stir to fully melt.
- Prepare the chopped coconut flakes in a second bowl and set aside for coating.
- Using a fork, dip and roll each cake ball into the chocolate until it is fully covered, shaking off excess chocolate. Then into the coconut bowl. Shake to cover with coconut and set coconut ball aside on a baking paper lined tray. Repeat with remaining cake balls.
- Place tray in the fridge for 1 hour to set the coconut snowballs.

Port, Walnut & Raisin Truffles (Charosets)
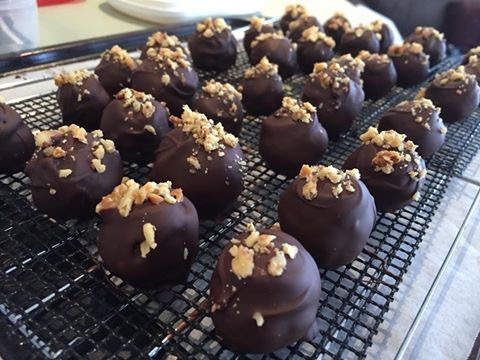
Level of Difficulty : Easy
Makes about 50 charosets
Ingredients:
- 10 Fresh Dates (200g), seeded
- 1/2 Cup Raisins (70g)
- 1 Cup + 1/3 Cup Walnuts (110g + 36g), coarsely chopped and roasted
- 1.5 tbsp Sweet Fortified Red Wine or Port
- Pinch salt
- 300g Dark Chocolate (70% cocoa), for tempering and coating
Instructions:
- Soak dates for 10 mins in boiling water until just covered.
- Once the dates are tender, drain them and toss them in a blender.
- Blend dates, raisins, salt, 110g walnuts and port until mixture forms a sticky paste. (Be careful not to overwork your blender as you may fry the motor if not careful)
- Wet hands and roll small teaspoons of mixture into a small ball.
- Place on a parchment paper lined tray.
- Cover with plastic wrap and chill overnight.
- The next day, start by prepping the 1/3 cup of walnuts. These should be roasted and then chopped fairly well for sprinkling overtop the truffles.
- Then prepare the tempered chocolate coating by placing the dark chocolate into a small bowl and microwave for 30 seconds. If half melted, take out of the microwave and stir until fully melted. If not yet at the halway melt point, return to the microwave for another 10 seconds, or as needed.. keep monitoring for the halfway melt point.
- Then take the bowl out and let the remaining hard chocolate melt by sitting in the melted chocolate, stirring occasionally. Chocolate should be at room temperature when the final last bit melts away.
- Dip a chilled date ball into the tempered chocolate mix (ideally with a truffle spoon or fork), let the excess chocolate drip off and place on a baking sheet.
- Immediately top the chocolate truffle with a pinch of chopped walnuts before the chocolate hardens.
- Continue with remaining truffles then refrigerate for at least 1 hour (or you can leave the chocolate to harden at room temperature – which many chocolatiers prefer).

Zesty Tomato & Ganache filled Chocolate Truffles
Level of Difficulty : Easy
Makes 30 truffles
Ingredients:
- 200g Dark Chocolate (45%), cubes separated - for the ganache
- 3 tbsp Cream
- 3.5 tbsp Tomato Puree (triple concentrate with no added salt)
- 200g Dark Chocolate (60-75%), cubes separated - for the tempered shell
Instructions:
- In a bain-marie, melt all the dark chocolate. Remove bowl from the heat.
- Stir in the cream. Then, once combined, the tomato puree.
- Place bowl in the fridge for an hour to chill.
- When the ganache is chilled and has hardened a little, temper the 60-75% dark chocolate.
- Place the tempered chocolated into a bowl. With a chocolate dipping stick, pick up the chocolate and dip it into the tempered chocolate until fully covered, let drip for a bit, then transfer these chocolates to a baking tray to allow them to cool and harden.
- I find they keep the freshest when they are kept in the oven overnight or over a few days.

Chocolate Beet Truffles (Vegan)
Very fudgey. Tasty and no coconut oil! Vegan chocolate tempering did overpower the beetroot but on its own the beetroot treats were very beetrooty, so perhaps instead coat with coconut flakes.
You can also make the taste even stronger by adding dehydrated beetroot powder in addition to fresh beetroot.
Ingredients:
- 1 small beet (125-140g), cooked, peeled and chopped roughly
- 12 Medjool dates (170g), soaked in hot water for 10 mins and then pitted and chopped finely
- 1 teaspoon vanilla extract
- 1/2 teaspoon sea salt, plus more to taste
- 4 + 2 tablespoons (30g) raw cacao powder, divided
- 1/4 cup (22g) oat flour - If you’re making your own oat flour, take slightly more than 1/4 cup of rolled oats (22 grams) and add it to a food processor. Blitz until the oats have turned into a fine powder.
- 3 ounces (85g) of good-quality, dairy-free dark chocolate, for tempering and coating
Instructions:
- In a food processor, blend the beets, dates, vanilla extract, salt, and 1/4 cup or 4 tablespoons of the cacao powder (or 20g) until the ingredients are well combined and starting to come together as a sticky paste.
- Add the remaining 2 tablespoons of cacao powder (or 10g) and the oat flour to the food processor. Blend again until the ingredients are well combined and a dough has formed.
- Taste and add more salt, as desired. The dough will be quite sticky at this point.
- Transfer the dough to a bowl and cover. Freeze for at least 1-2 hours. This step is essential, so don’t skip it.
- Line a baking sheet with parchment paper.
- Melt the dark chocolate in a large bowl, using either a double boiler method, or in the microwave in 30-second intervals. Allow to cool for 5 minutes.
- Prior to rolling the truffles, put on food-safe gloves while rolling the balls because the dough is sticky and beets tend to stain, so your hands will get really messy if you roll them with your bare hands.
- Remove the truffle dough from the freezer.
- Using a rounded tablespoon or mini ice cream scooper, scoop the truffle dough and roll into evenly-sized balls. Transfer the balls to the baking sheet.
- Using a slotted spoon or similar utensil, dip one truffle at a time into the melted dark chocolate, and coat it all over.
- Transfer back to the baking sheet.
- Work quickly, as the melted chocolate will set pretty quickly and your toppings won’t stick once the chocolate has set. Repeat with each truffle.
- You can serve them immediately, but I prefer to return them to the freezer for 15-30 minutes to set. Store leftovers in an airtight container in the freezer (they don’t need to be defrosted).
Source : https://rainbowplantlife.com/vegan-chocolate-truffles/#wprm-recipe-container-6620

Hot & Cold Chocolate Truffles
Level of Difficulty : Easy
Makes 30 truffles
Ingredients:
- 200g Dark Chocolate, melted for the ganache
- 1/3 Cup (80ml) Pure Cream
- 2 tbsp Peppermint Essence, or to taste
- 2 tsp Hot Chilli Powder, or to taste
- 200g Dark Chocolate, for tempering and coating
Instructions:
- To create the ganache, start with a bain-marie pan and melt the chocolate.
- In a heat resistant bowl, mix cream, melted chocolate, peppermint essence and chilli powder until well blended.
- Set aside in the fridge to chill for 30-60 mins until firm enough to make balls of ganache.
- Roll tablespoons of the mixture into balls and refrigerate ganache balls for a further 15 mins.
- Meanwhile prepare the tempered chocolate coating by placing the remaining 200g of dark chocolate into a small bowl and microwave for 30 seconds. If half melted, take out of the microwave and stir until fully melted. If not ready yet, return to the microwave for another 10 seconds, or as needed.. keep monitoring for the half melted point.
- Then take the bowl out and let the remaining hard chocolate melt by sitting in the melted chocolate, stirring occasionally. Chocolate should be at room temperature when the final last bit melts away.
- Dip a chilled ganache ball into the tempered chocolate mix (ideally with a truffle spoon or fork), let the excess chocolate drip off and place on a baking sheet.
- Continue with remaining truffles then refrigerate for at least 1 hour (or you can leave the chocolate to harden at room temperature – which many chocolatiers prefer).

Chocolate & Marshmellow Truffles
Level of Difficulty : Easy
Makes 30 truffles
Ingredients:
- 200g Dark Chocolate, melted for the ganache
- 1/3 Cup (80ml) Pure Cream
- 100g Mini Marshmellows
- 200g Dark Chocolate, for tempering and coating
Instructions:
- To create the ganache, start with a bain-marie pan and melt the chocolate.
- In a heat resistant bowl, mix cream and melted chocolate until well blended. Set aside to cool on the countertop for 10 mins. Then when the mixture is at room temperature, fold in the mini marshmellows.
- Set aside in the fridge to chill for 30-60 mins until firm enough to make balls of ganache.
- Roll tablespoons of the mixture into balls and refrigerate ganache balls for a further 15 mins.
- Meanwhile prepare the tempered chocolate coating by placing the remaining 200g of dark chocolate into a small bowl and microwave for 30 seconds. If half melted, take out of the microwave and stir until fully melted. If not ready yet, return to the microwave for another 10 seconds, or as needed.. keep monitoring for the half melted point.
- Then take the bowl out and let the remaining hard chocolate melt by sitting in the melted chocolate, stirring occasionally. Chocolate should be at room temperature when the final last bit melts away.
- Dip a chilled ganache ball into the tempered chocolate mix (ideally with a truffle spoon or fork), let the excess chocolate drip off and place on a baking sheet.
Continue with remaining truffles then refrigerate for at least 1 hour (or you can leave the chocolate to harden at room temperature – which many chocolatiers prefer).

Bloody Good Halloween Truffles
Level of Difficulty : Medium

Ingredients:
- 2x200g Dark Chocolate (45%), for tempering / coating
Ingredients (Fake blood):
- Glucose Syrup (1/2 cup)
- Coffee (1 tbsp)
- Red Food colouring (1 drop)
- Blue Food colouring (tip of a toothpick, not even a drop)
- Amaretto Liqueur (1-2 tbsp)
Instructions:
- Meanwhile prepare the first half of the tempered chocolate mixture by placing 200g of dark chocolate into a small bowl and microwave for 30 seconds. If half melted, take out of the microwave and stir until fully melted. If not ready yet, return to the microwave for another 10 seconds, or as needed. Keep monitoring for the half melted point.
- Then take the bowl out and let the remaining hard chocolate melt by sitting in the melted chocolate, stirring occasionally. Chocolate should be at room temperature when the final last bit melts away.
- Pour tempered chocolate into a mould set covering the base and inner walls of the chocolate moulds. Tap the moulds on the counter to ensure that all the air bubbles rise to the surface. You want the chocolate surface to be fairly thick all around the base and walls.
- Then turn the mould upside down and pour out all the chocolate that has not coated the base and walls of the mould. Scrape the melted chocolate off the top of the mould as well. Set remaining chocolate aside. Set mould with tempered chocolate on base and inner walls aside to harden in the fridge, uncovered, for about 15 mins.
- Prepare the fake blood by mixing all the ingredients together. Adjust taste and colour as needed.
- Once tempered chocolate in the moulds has hardened, carefully pour some fake blood to fill the mould pockets up to 3/4 full.
- Then prepare more tempered chocolate as above, mixing in the remaining chocolate from the first step.
- Once the tempered chocolate is ready, pour tempered chocolate over the fake blood mixture in the mould, until it just covers the blood but does not spill over the edges of the individual mould shapes.
- Set filled chocolate moulds aside to harden in the fridge, uncovered, for about 30-60 mins.
- Once ready, pop out the chocolates and place them in a container to keep (in or outside of the fridge). If in the fridge, make sure you take them out at least 30 mins before serving so that they are room temperature (the chocolate tastes much better that way).

Hot Toddy Warm Lemon Pudding Mini-Cakes

Delicious and Warm for those cool winter days and nights!
Serves 4
Ingredients:
- 60g Unsalted butter, at room temperature
- 1.25 Cups Caster Sugar
- 1 Cup Milk
- 2 Eggs
- 1/3 Cup Fresh Lemon Juice
- 2 tsp finely grated lemon zest
- 1/3 Cup Plain Flour
- 1 tsp Baking Powder
- 2 tsp Whiskey (optional)
- Icing sugar to dust
- Berry Sauce or seasonal fruit, to serve (optional)
Instructions:
- Preheat the oven to 170C.
- Lightly grease four 200mL ramekins or small baking dishes.
- Place the butter, sugar, egg, milk, lemon juice and zest, flour, baking powder and whisky in a food processor and process until smooth.
- Divide the mixtures among the grease ramekins.
- Bake for 25 mins or until lightly golden.
- Remove from the oven and leaves to stand for 5 mins.
- Dust with icing sugar and serve with berry sauce or seasonal fruit.

Glazed Ricotta Cheese with Figs and Port
Serves 6.
Ingredients (Cheese Base):
- 1 1/2 Cups (12 ounces) Cream Cheese
- 1/2 Cup plus 2 tbsp (6 ounces) Ricotta Cheese
- 1/4 Cup plus 2 tbsp Granulated Sugar
- 1 Vanilla Bean, split and scraped
- 2 Whole Eggs
- 1 Egg White
- 3/4 Cup Heavy Cream
Ingredients (Cheese Base):
- 1 1/2 Cups (375ml) Port
- 10-15 Small Ripe Black Mission Figs, stem removed, cut into very small cubes
- 1/3 Cup Granulated Sugar
Ingredients (Cheese Base):
- 3 tbsp White Granulated Sugar
Instructions (Cheese Base):
- Cream the cream cheese until smooth.
- Add the ricotta, sugar and vanilla bean seeds. Blend well.
- Add the eggs, egg white and cream. Mix on medium until totally incorporated.
- Place mixture in the fridge to chill.
Instructions (Fig Port Sauce):
- Combine all ingredients in a small saucepot.
- Cook over medium heat until the mixture is reduced to half or slightly less. Let cool.
- Divide the fig port sauce evenly among six 4-ounce ramekins (or across more smaller ramekins) and place them in the freezer to firm up for about 1 hour.
Instructions (Assembly):
- Preheat oven to 275F.
- Remove the ramekins from the freezer and pour the cheese base over the fig port sauce, filling each to the top.
- Place the ramekins on a baking tray that has a 1-2 inch rim and pour boiling water into the space around the ramekins (making sure no water gets inside), up to halfway up the sides of the ramekins.
- Bake for 30mins or until set. Test by gently tapping the side of a ramekin to see if liquid ripples. If it has set, remove from the oven and cool.
- Sprinkle the white granulated sugar evenly over the top of the cheese. Melt and caramelise with a blow torch, or, watching closely, place them under an oven broiler at high heat for just a few mins until the sugar melts and browns.

Espresso, Fig and Hazelnut Cheesecake

Ingredients (Biscuit Base):
- 150g Digestive (AU) or Graham Cracker (North Am) Cookies
- 80g Butter, Melted
Ingredients (Fig layer):
- 250g Dried Figs, coarsely chopped
- 2 tbsp Brandy
Ingredients (Espresso Cheesecake filling):
- 250g Cream Cheese, room temperature
- 250g Light Sour Cream
- 250g Mascarpone Cheese
- 110g Caster Sugar
- 3 Large Eggs
- Pinch of salt
- 1/2 Cup Water
- 1/4 Strong Espresso (or 2 tsp of quality instant coffee + 1/4 cup hot water)
- 2 x 1 Cup (100g) Hazelnuts, roasted then skins removed (1 half ground to hazelnut meal, 2nd half pick out all the good looking ones and very coarsely ground the remainder for garnish)
Instructions (Biscuit Base):
- Grease and line cheesecake pan.
- Prepare base by blitzing cookies to a crumb. Combine crumb with melted butter.
- Place the mixture on the base of the cheesecake pan. Use a spoon to distribute
evenly.
- Place pan with mixture in the fridge to chill for 30 mins.
Instructions (Fig layer):
- Meanwhile, in a small saucepan, over medium heat, place chopped figs and brandy.
Add 1/2 Cup water, 1 tbsp at a time to keep the figs moist.
- Cook for 8-10 mins until figs break down almost into a paste. Transfer the mixture
to a blender and process until smooth. Add more water, a tbsp at a time, until it
becomes an easily spreadable jam.
- Pour fig mixture over the cookie crumb base. Place a sheet of baking paper over top
and spread the mixture flat and evenly across the base. Remove baking paper.
- Return cake pan to the fridge to chill for another 30 mins.
Instructions (Filling and baking):
- Preheat the oven to 140C.
- Prepare the espresso filling next. Combine cream cheese and sugar until very
smooth.
- Mix in sour cream, mascarpone, espresso mixture and pinch of salt.
- Whisk in the eggs and then the hazelnut meal.
- Pour filling gently over the fig layer.
- Bake for 20-25 mins. Top the cake with the full and coarsely chopped hazelnuts.
- Then return the cake to the oven and bake for a further 10-15 mins until there is
only a gentle wobble in the middle while the rest is set.
- Leave in the oven with a closed door for 1 hour. Then with the oven door ajar,
another hour until room temperature. Place in the fridge for at least 4 hours or
overnight to set.

Banana Salzburger Nockerln
(Chocolate Banana Souffle)
Makes 8 Servings
Ingredients:
- 1 tbsp Butter
- 1/4 Cup Light Brown Sugar
- 2 tbsp Sugar
- 2 Ripe Bananas, roughly mashed
- 2 tbsp Rum
- 1 tbsp Lemon Juice
- 8 Egg Whites
- 1/4 Cup Sugar
- 2 tbsp All-Purpose Flour
- 4 Ounces Bittersweet Chocolate, chopped into 1/4 inch chunks
Instructions:
- In a heavy-bottomed saucepan over high heat, combine the butter and sugars. Allow the mixture to caramelise to a deep amber colour (until the sugars have melted).
- Add mashed bananas and stir to blend.
- Add the rum (Careful, it may flame).
- Cook for 1 more minute, the remove pan from the heat.
- Blend in the lemon juice.
- Let cool slightly and then puree the banana mixture in a blender.
- Transfer to a bowl and let stand in the refrigerator until cool, for about 20 mins.
- Preheat the oven to 400F. Brush 8 small souffle ramekins with melted butter and coat with granulated sugar, tapping the out the excess.
- Whip egg whites to soft peaks, then sprinkle in the sugar while continuing to whisk until medium peaks.
- Sift the flour over the whites and fold it in gently.
- Fold the chopped chocolate into the banana mixture until just mixed.
- Fold the whipped whites into the banana and chocolate mixture gently. (Start with a quarter of the whites to loosen the banana mixture, then half of the remaining mixture, then the rest). Careful not to overmix or deflate the whites.
- Spoon the mixture into the prepared ramekins and bake for 12 to 14 mins or until golden.
- Serve hot!

Rice Pudding (Not Runny!)
Ingredients:
- 5 cups of milk
- 1 cup of rice
- 6 tablespoons of sugar
- 1 teaspoon of salt
- 3/4 cups of raisins
- Pinch of cinnamon
Instructions:
- Heat milk in a deep saucepan to a boil
- Reduce heat to medium, add rice, sugar, and salt
- Mix well and cook for 1 hour -- during cooking, stir rice occasionally
- Stir in raisins, cook 15 minutes longer
- Remove from heat, cool in refrigerator for at least 1/2 hour before serving
- Sprinkle portions with cinnamon

Medieval Apple Mousse
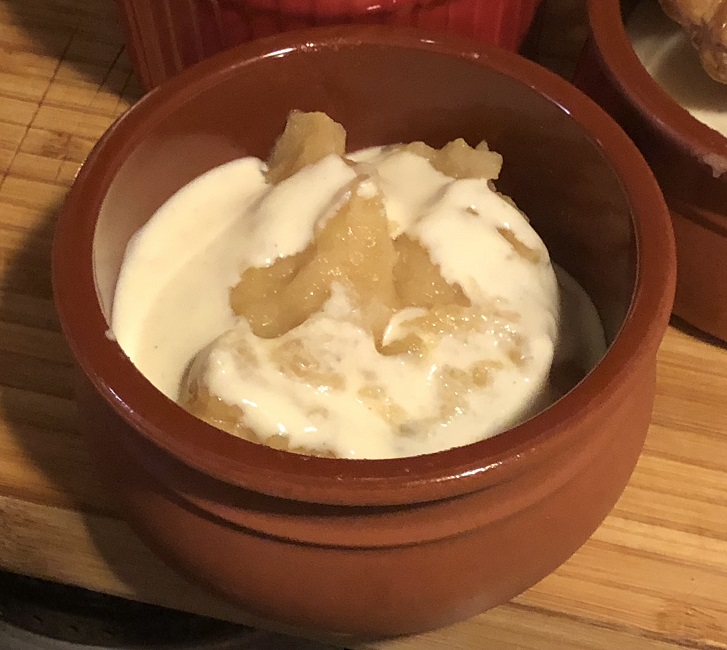
Goes beautifully with Medieval Bastard Cream.
Serves 8
Ingredients:
- 3 Cups Apple Sauce
- 1/2 Cup Caster Sugar
- 3 Egg Yolks
- 1/2 tsp Cinnamon
- 1/2 tsp Ginger
Instructions:
- In a medium saucepan, over medium heat, combine all ingredients and cook while stirring until mixture thickens.
- Serve warm or cold.

Indian-inspired Beetroot Halva

Serves 8.
Makes 1-2 cups.
Ingredients:
- 500g Beetroot
- 3/4 Cup Milk
- 1/4 Cup Water
- 90g Sugar
- 3 Cardamom Pods, bruised
- 2 tbsp Raisins
- 2 tbsp Cashews or Almonds, toasted and chopped roughly
- Delicious with vanilla ice cream (optional)
Instructions:
- Clean the beetroot thoroughly, remove the roots and stem, then grate them finely.
- In a medium saucepan, over low heat, cook the milk, water and grated beetroot for 20 mins.
- Stir in the sugar and cardamom pods.
- Continue cooking for another 30 mins until the sugar has dissolved and all the liquid has been absorbed.
- Stir in the ghee and raisins. Simmer for 2-3 mins.
- Serve warmed or cold, with a sprinkle of chopped nuts and ice cream if you have it.

Vietnamese Pandan Sticky Rice
Ingredients:
- 250g Sticky Rice
- 10 Pandan Leaves, chopped (or Pandan Essence)
- 50g Shredded Coconut Meat
- 20g Toasted Sesame Seeds
- 30g Sugar
Instructions:
- Add chopped pandan leaves to a food processor with about 2 cups of water, and process until the leaves are finely ground.
- Use a piece of cloth to squeeze the pandan juice.
- Soak the rice in pandan juice for 8-10 hours or overnight.
- Add the soaked rice to a steamer and steam over medium heat for 35-40 mins.
- Add sugar to the hot cooked rice, toss to dissolve sugar thoroughly. Serve with toasted sesame seeds.

Sour Cream Old-Fashioned Doughnuts with Vanilla Glaze
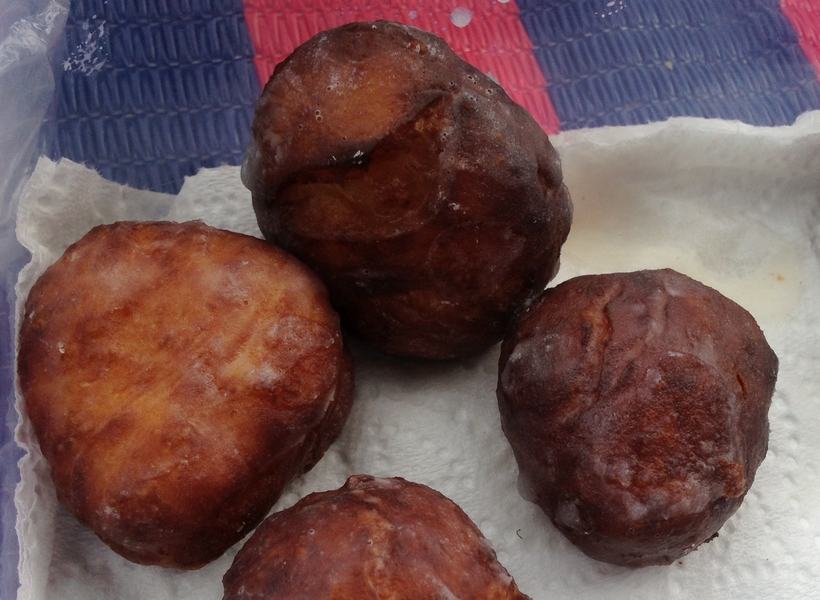
Prep & inactive time 1 hour, Cooking time 1 hour.
Serves 1 dozen doughnuts and holes.
Ingredients (Doughnuts):
- 2 1/2 Cups of Cake or Plain Flour, sifted (plus more for rolling and cutting)
- 1 1/2 tsp Baking Powder
- 1 tsp Salt (iodized)
- 1 tsp Ground Nutmeg
- 1/2 Cup Sugar
- 2 tbsp Shortening - But this isn't available in Australia, so used butter instead (not exactly the same but results were still tasty).
- 2 Large Egg, yolks only
- 2/3 Cup of Sour Cream
- 1 container of Canola or Vegetable Oil for deep frying
Ingredients (Glaze):
- 3 1/2 Cups Confectioner's Icing Sugar (Pure)
- 1 1/2 tsp Light Corn Syrup or Golden Syrup
- 1/4 tsp Salt
- 1/2 tsp Vanilla Extract
- 1/3 Cup + 1 tbsp Hot Water
Instructions:
- Blend sifted flour, baking powder, nutmeg and salt in a medium bowl.
- Seperately, mix the sugar and butter until light and fluffy.
- Add the egg yolks to the sugar mixture. Mix well until fully combined, light and thick.
- Add the dry ingredients to the wet mixture, gradually, alternating with addition of sour cream until well combined.
- Dough will be sticky like cookie dough.
- Transfer to a clean bowl and refrigerate, covered with plastic wrap for at least 45 mins (or up to 24 hrs).
- Once the dough is out of the fridge, prepare a very deep pan for frying. Using a candy thermometer, heat oil (at least 2 inches deep) to 325F/165C.
- Roll out the chilled dough on a generously floured flat surface to 1/2 inch thick, flouring the top of the dough and the rolling pin as necessary to prevent the dough from sticking.
- Use the top of glasses or coffee mugs, or cookie moulds to cut doughnut and/or hole shapes, dipping the cutter into flour between cuts.
- Fold together remaining dough and reroll to form more doughnut and/or holes. Repeat until no more dough remains.
- Shake any excess flour off the cut shapes before carefully adding them, in batches, to the hot oil. Make sure you don't have too many frying at the same time, otherwise they won't fry well.
- Once the doughnuts float, fry for 15 secs more, then flip them to fry on the other side for another 1-2 mins until brown and cracked. Then flip and fry the first side again for another 1-2 mins until golden brown.
- Transfer finished doughnuts and/or holes to a wire rack or plate lined with or set over paper towels to absorb the oil.
- While the doughnuts are frying, prepare the glaze. Place the icing sugar, syrup, salt, vanilla and hot water in a large mixing bowl. Whisk the mixture until smooth. If the glaze seems too thick, add more water, a tsp at a time. Set aside until doughnutd.
- To glaze, dip each side of every doughnut (while still hot) in the warm glaze, and let dry for 10-15 secs on the racks before serving.

Banana Fritters

Makes 25 fritters
Prep = 15 mins + set overnight. Cooking = 15 mins.
Ingredients:
- 500g Mashed Ripe Bananas (about 4)
- 360g (2 cups) Rice Flour (have more on hand if needed)
- 2 tsp Cinnamon
- 2 tbsp Lemon Juice
- 150g (2/3 cup) Caster Sugar
- Vegetable Oil, for frying
- Icing Sugar, to dust
Instructions:
- Combine mashed bananas, rice flour, cinnamon, lemon juice and sugar in a bowl.
- Set aside to rest for 4 hours, or overnight (or if in a rush 30 mins but texture will be slightly grainier).
- Fill a saucepan or wok one-third with oil and heat to 170C (or until a cube of bread turns golden in 15 seconds).
- Working in batches, drop heaped spoonfuls of mixture into oil and fry, turning for 6 mins or until golden brown.
- Drain on paper and repeat with remaining batter.
- Once slightly cooled, dust with icing sugar. Serve warm.

Apple & Ricotta Fritters (GF)
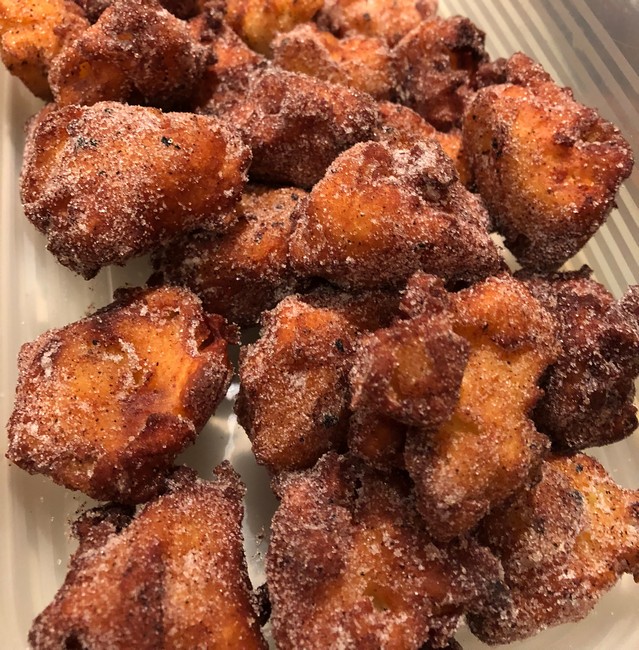
Makes 24 fritters. Very quick recipe.
Relatively low sugar.
Suggest you caramelise the diced apples in butter, cinnamon and sugar first.
Ingredients:
- 1 3/4 Cup Ricotta Cheese
- 2/3 Cup Gluten Free Flour, sifted
- 1/2 tsp Gluten Free Baking Powder
- 2 tbsp Caster Sugar
- 1/2 tsp Ground Nutmeg
- 1 Egg
- 1 Large Apple, peeled, finely diced
- Vegetable Oil, for deep frying
- 1/3 Cup Caster Sugar
- 2 tsp Ground Cinnamon
Instructions:
- Combine, in a small bowl, 1/3 cup caster sugar and 2 tsp cinnamon. Set aside.
- In a large bowl, mix ricotta, sifted flour, sugar, nutmeg, egg and apple in medium
bowl.
- In a large deep saucepan for deep frying, heat 2 inches of oil to 170C.
- Gently drop a full tablespoon of ricotta mixture to make a fritter.
- Repeat to a max of 5 fritters cooking in the pan at one time.
- Once golden, transfer the fritters to a draining rack. After resting for 5 secs,
toss the fritter in the cinnamon sugar mixture and return to the rack to cool.

Indian Gulab Jamun Sweet Donuts (with Ricotta)
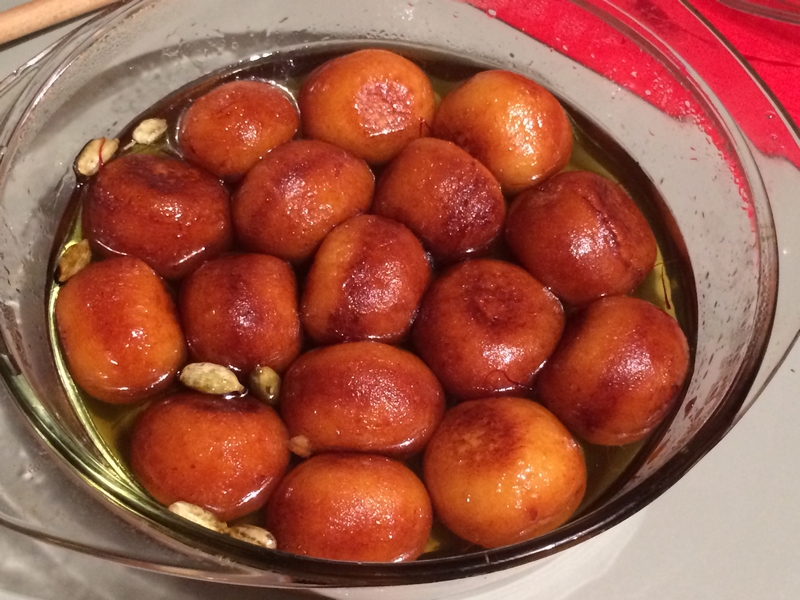
Makes a dozen.
Best eaten the day it is made.
Warning : Heating up Gee for frying certainly stinks up the kitchen.
Ingredients:
- 190g Ricotta
- 1 Cup (120g) Full-Cream Milk Powder
- 1/3 Cup (50g) Plain Flour, sifted
- 1/3 Cup (55g) Fine Semolina
- 1/2 tsp Baking Powder
- 2 tbsp Milk
- 400g Ghee, melted for frying
- 1.5 cups (330g) Caster Sugar
- 6 Cardamon Seeds + 1/2 tsp Cardamon Powder
- Pinch of Safron threads
- Optional: Edible silver leaf, for decoration
Instructions:
- Place ricotta in a sieve to remove as much liquid as possible from the ricotta.
- Transfer ricotta to a large bowl. Add milk powder, flour, semolina and baking powder. Stir mixture lightly as you don't want gluten to form (otherwise the dough becomes too dense and the inside won't be soft).
- Gradually combine milk and 1 tbsp ghee. Then mix until dough comes together.
- Cover with plastic wrap and chill for 20 mins in the fridge.
- Roll into approx 12 small balls (as they will grow in size when fried). The mixture will be sticky but smooth, so apply a little oil on your palms to prevent them from sticking to your hands.
- Place on a baking paper lined tray and chill for a further 10 mins.
- Meanwhile, to make syrup, place a saucepan on medium heat and cook sugar, 1.5 cups of water, safron and bruised cardamon pods and ground cardamon. Stir for 5 mins until the sugar is dissolved and then allow to cook without stirring for another 10 mins until mixture has thickened into a light syrup. Remove from heat, pour into a serving dish and keep warm.
- In a wok or a deep sauce pan, heat remaining ghee over medium-high heat to 150C. Fry the balls, in batches, for 3-4 mins until golden. Note: Turn the balls immediately and frequently after being placed in the ghee with a slotted spoon so that they don't get flat sitting on the bottom and so that they brown evenly.
- When golden, remove and drain for just a few seconds on a paper towel. Then place in the syrup for at least 1 hr.
- Optional : Garnish with silver leaf, if desired then serve.

Classic Fruit Salad

Ingredients
:
- 600g Pineapple, peeled and diced
- 800g Rockmelon, peeled and diced
- 800g Seedless Watermelon, peeled and diced
- 250g Strawberries, hulled and quartered
- 3-4 Kiwis, peeled and diced
- 200g Seedless Green Grapes, halved
- 200g Seedless Red Grapes, halved
- 4 Passionfruit, halved
- 1 tbsp Lime Juice. Alternatively, instead of the lime juice, add 1 cup of orange juice.
- 1-2 tbsp Sugar
- Optional: Chopped Mint Leaves
Instruction
:
- Place all the ingredients in a large bowl and toss well.
- Let sit for 30 mins to macerate and chill before serving.

Coconut-Glazed Baked Nectarines
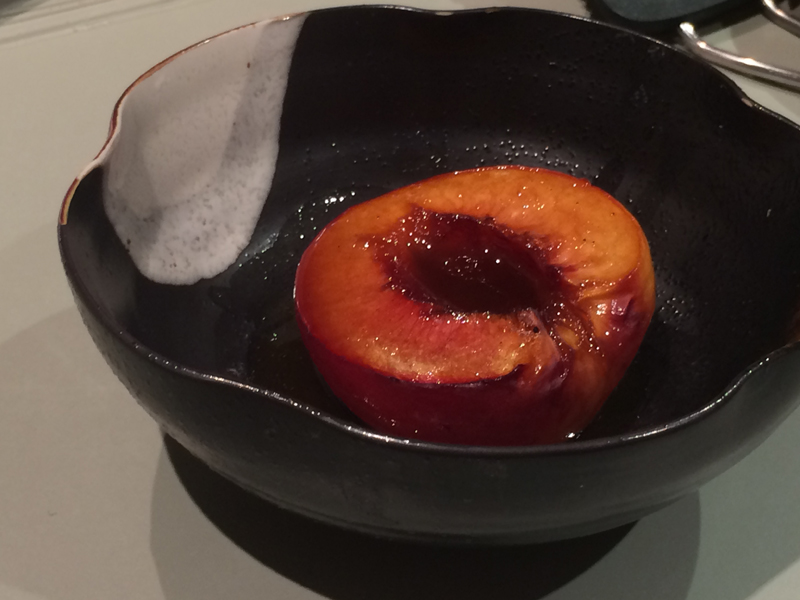
Ingredients:
- 3 Ripe Nectarines
- 2 tbsp Coconut Oil
- 2 tbsp Coconut Sugar
- 1-1.5 Cups Water
Instructions:
- Preheat oven to 175C.
- Cut the nectarines in half and remove the pits.
- Place the nectarines in a deep baking dish.
- Drizzle with coconut oil
- Sprinkle with coconut sugar
- Pour water in to the baking dish to give 1/2 inch water in the dish.
- Bake for 30 mins. Serve warm (with ice cream if available).

Swedish Chocolate Oat Balls (Chokladbo Llar)

No bake
Ingredients:
- 1 1/2 cups quick oats
- 1/4 cup sugar
- 6 tbsp butter
- 2 tbsp cocoa powder
- 1/2 tbsp vanilla extract
- 1 tbsp brewed coffee
- Coconut flakes, blitzed to a fine crumb, or pearl sugar (a popular swedish sugar for sweet pastries), for rolling in
Instructions:
- Combine butter, sugar, oats, cocoa powder, vanilla, and coffee.
- Roll into 1" diameter balls about the size of a meatball.
- Roll balls in coconut or, if you have a serious sweet tooth, pearl sugar to decorate.
- Eat right away, or refrigerate, or freeze if you prefer a harder consistency.
Source : https://skonafika.com/chokladbollar

Banana, Walnut & Tahini Bliss Balls (candy eyes optional)

(GF, Vegan, Dairy Free, sugar free and amazing tasting).
Makes 20 Bliss Balls
Ingredients:
- 300g Pitted Dried Dates
- 200g Soft dried bananas, chopped
- 2 Cups Boiled Water
- 130g Walnuts, chopped to a coarse small pieces
- 2 tbsp Tahini
- 1 tsp Vanilla Paste
- 2 tbsp Sesame Seeds, toasted
- 100g Dessicated Coconut (my favourite is the Moist Coconut Flakes package for the tastiest option), blended finely
Instructions:
- In a large heat proof bowl, place dried dates, bananas and 2 cups of boiled water. Let sit for 15 mins to soften dates and bananas.
- Drain hot water and place softened dates and bananas in a food processor with tahini and vanilla.
- Process mixture to a smooth-ish paste.
- Mix in chopped walnuts and toasted sesame seeds.
- Refrigerate mixture for 20 minutes.
- Place chopped coconut flakes in a medium sized bowl or container. Set aside.
- On a tray lined with baking paper, take a heaped teaspoon of mixture, roll it into a ball, cover the ball in chopped coconut (by rolling it around in the coconut bowl) and place the coconut coated bliss ball on the tray. Proceed with the remaining mixture.
- Place tray in the fridge for 1 hour. Remove from the fridge about 15 mins prior to serving.

Turkish Bebek Almond Truffles
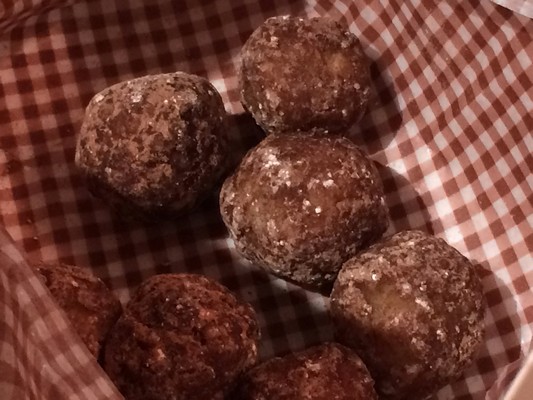
Makes about 10
Ingredients:
- 50g Sugar
- 4 Drops Lemon Juice
- 1/2 tsp Orange Blossom Water
- 150g Ground Almonds
- 1 tbsp Frangelico or Amaretto
- 50g Dark Cocoa Powder, sifted
- 20g Icing Sugar, sifted
- 5ml Water
Instructions:
- In a medium-sized saucepan, over high heat, bring the water to a boil. Stir in the sugar until it has dissolved.
- Reduce the heat to a simmer. Add the lemon juice and the orange blossom water.
- Remove from the heat and pour into a heat proof bowl with the ground almonds. Mix well.
- Add the frangelico and knead the mixture for 5 minutes, until a smooth paste forms.
- In a small bowl mix the sifted cocoa powder and icing sugar.
- Take a tablespoon of the almond dough and roll it into a small ball. Coat with the cocoa sugar mixture and set aside. Repeat with remaining dough.
- Once the dough balls are all complete, place them in the fridge to chill for at least 1 hour.
- To serve, remove them from the fridge at least 20 mins beforehand so that they are at room temperature when enjoyed.

Peanut Butter Bliss Balls
Makes 36 peanut butter balls.
Ingredients:
- 40g Butter + More if dough is not sticky enough
- 250g Brown Sugar
- 85g Desiccated Coconut, chopped finely + 50g extra to coat, also chopped finely
- 115g Walnuts, finely chopped
- 180g Peanut Butter (about 2/3 Cup)
Instructions:
- Melt the butter and sugar in a medium saucepan over low heat, stirring, until the sugar has dissolved.
- Then stir in the coconut, walnut and peanut butter until combined. Remove from heat. Let mixture cool.
- In a medium-sized deep bowl, place the extra chopped coconut flakes.
- Roll 1 heaping teaspoon of dough into a ball and place in the bowl with the chopped coconut flakes. Roll to coat and place on a lined tray.
- Cover the tray with plastic wrap and place the tray in the fridge for 30 mins or until firm.

Carrot Bliss Balls
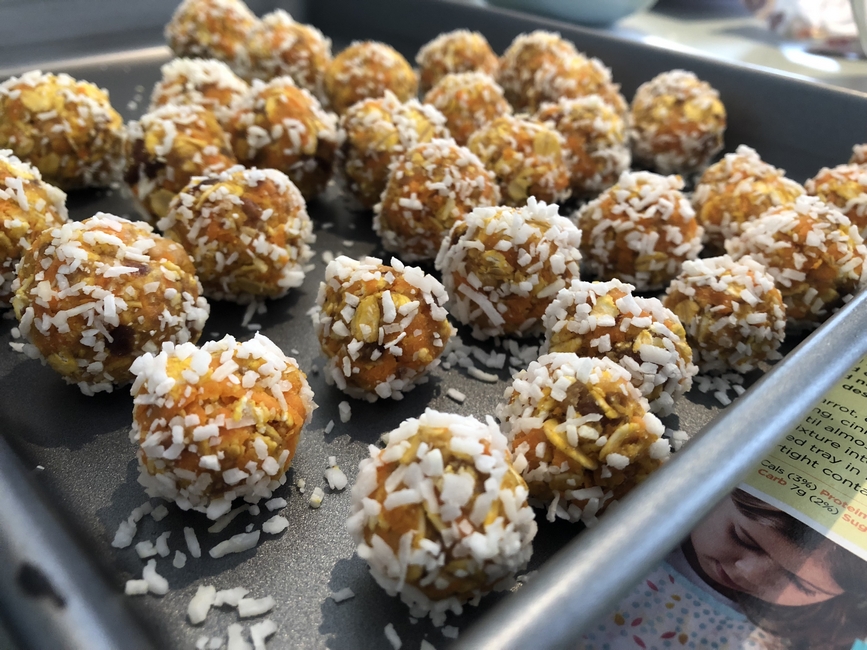
Tasty - 7 out of 10 rating
Prep 10 mins + Sitting 1hr = Total 1hr 10mins
Makes 14
Ingredients:
- 1 Large Carrot, peeled and coarsely grated
- 6 Dried Dates, pitted and chopped finely
- 1/4 cup (40g) Dried Pineapple, finely chopped
- 1 cup (90g) Rolled Oats
- 1/2 tsp Ground Cinnamon
- 1/4 tsp Ground Nutmeg
- 1/2 cup (40g) Desiccated Coconut
Instructions:
- In a food processor, process carrots, dates, pineapple, oats, cinnamon and nutmeg until almost smooth.
- Roll the mixture into balls.
- Roll in coconut to coat.
- Place on a lined tray in the fridge for 1 hour or until set.
- Store in an airtight container in the fridge for up to 1 week.
Source: https://www.taste.com.au/recipes/carrot-cake-bliss-balls/wwxxbh02

Classic Rum Balls

Makes 2 dozen rum balls
Ingredients:
- 1 Packet of 200g Plain Sweet Biscuits (Arrowroot, Nice, etc.)
- 3 tbsp Cocoa Powder, sifted
- 1 + 1 Cups Moist Coconut Flakes, chopped finely (1 for rolling finished rum balls)
- 1/2 Can of Sweetened Condensed Milk (depending on size of biscuit pack)
- 3 tbsp of Rum (dark rum preferably)
- 1 Cup of Almond Meal - Add as much as needed to help ensure the right consistency
Instructions:
- Crush biscuits in a food processor until they are fine crumbs.
- In a bowl, combine thoroughly crushed biscuits, cocoa powder, condensed milk and rum. You should have a stiff mixture. If it is a hot day, place mixture in the fridge for 30 mins to stiffen.
- Use teaspoons to make small balls with the mixture, shaping them with your hands (wetting your hands before rolling will make it easier to handle). Then rolls the rum balls in the extra coconut flakes to coat. Place on baking sheet and put into the fridge (or freezer) for 30 mins.
- Once hardened, you can place them in a plastic container. Keep them in the fridge or freezer until ready to serve. Rum balls will last for weeks in the freezer.
Alternative Options :
- Extra Coconut Texture & Flavour : Change ingredients too : 250 gram plain biscuits, 395 gram can sweetened condensed milk, 1 cup (80g) desiccated coconut, 1/4 cup (25g) dutch-processed cocoa powder, 1/4 cup (60ml) dark rum, 1/2 cup (40g) desiccated coconut (toasted, extra). Source : https://www.womensweeklyfood.com.au/recipes/classic-rum-balls-1632
- With Roasted Nuts : Take whole roasted almonds or macadamia nuts, encase them in the rum ball mixture and roll into balls. Then dip the rum balls into melted chocolate and place in the freezer.
- With Rum-infused Raisins : Heat 1/4 Cup chopped raisins and 1 tbsp rum in a small saucepan over low heat. Bring to a simmer then remove from heat and set aside for 5 mins to macerate before adding it to the mixture alongside of the other ingredients in step 2.
- With Maple Syrup: Use 2 tbsp of Maple syrup alongside of the rum for a sweet twist.
- With Orange: Add the zest of 2 oranges for a jaffa-like taste to your rum balls.

Simple Mini Fruit-topped Pastry
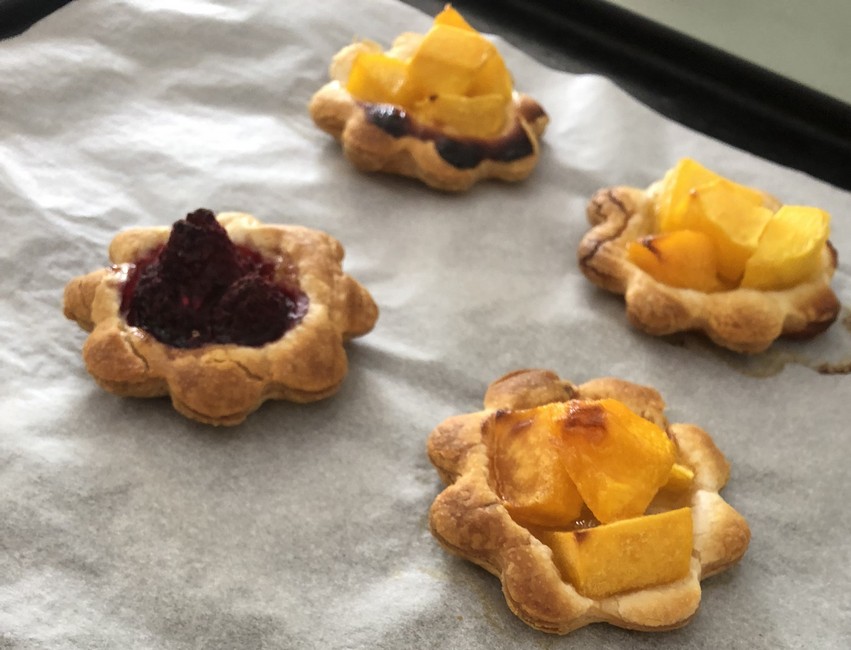
Serves 4-6
Ingredients:
- 30g Butter, melted, plus extra for greasing
- 1 Mango, diced in tiny 1/2 - 1cm cubes (frozen or fresh)
- 100g Raspberries, broken up (frozen or fresh)
- 1-2 Sheets of Puff Pastry
- 3 tbsp Apricot Jam, heated until slightly liquid
- 1 tbsp Butter, melted
- Icing Sugar, to finish
Instructions:
- Preheat oven to 220C.
- Cover a baking sheet with baking paper.
- Dice the mango by cutting the cheeks, then cutting a criss-cross pattern across the flesh. Then pushing the skin upwards from the centre, slice off the cubes. Cut into smaller cubes where easy to do.
- Cut out 4-6cm x 12cm rounds of puff pastry. Place them on the baking sheet, at least 2cm apart.
- Using a spoon or brush make a small circle of apricot jam in the middle of each round.
- Place a small amount of raspberry and mango in the center of the pastry, overtop the apricot jam.
- Lightly brush the pastry rim and fruit with the melted butter.
- Bake for 15 mins until the puff pastry is cooked, golden and crisp.
- Remove from the oven and immediately brush the fruit and pastry with the melted apricot jam to create a beautiful glaze.
- Sprinkle with icing sugar before serving (optional).

Middle Eastern Baklava Rolls
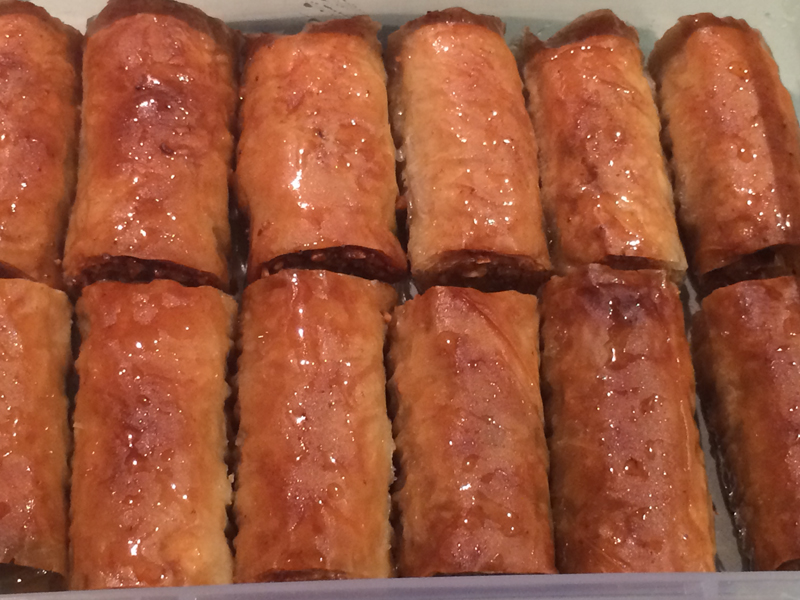
Easier to share and eat than the standard baklava squares, and just as simple to make.
Ingredients:
- 32 Sheets Filo Pastry Dough, at room temperature (keep in package until you have completed the fillings and prepared the butter)
- 2-3 Cups Butter, melted and cooled
Ingredients for the filling:
- 4 Cups Roughly Ground Walnuts (or a combination with roughly ground pistachio)
- 1/2 Cup Sugar
- 2 tsp Ground Cinnamon
- 1/2 tsp Ground Cloves
Ingredients for the syrup:
- 4 Cups Sugar
- 2 Cups Water
- 1 stick Cinnamon
- 2 tsp Lemon Juice
Instructions:
- Preheat oven to 180C and line a deep rectangle baking pan with baking paper.
- Make the filling by combining walnuts, sugar, cinnamon and cloves. Stir until well blended.
- To assemble the pastry, take out the filo pastry dough and place a towel on top to keep the pastry from drying.
- Working on a large clean and dry flat surface, place 1 sheet of filo pastry on the surface and use a pastry brush to coat it with a light layer of the cooled melted butter (it shouldn't be soaked).
- Place a second sheet of filo pastry over top the first. Brush this second sheet of pastry with butter also.
Cover remaining filo pastry sheets with towel.
- Take a 1/4 cup of the nut mixture and spread it evenly across the bottom half (should make a square) of the filo pastry.
- Take the bottom short end of the pastry (the end with the nut mixture) and make a tight roll all the way to the other end.
- Cut the roll in half, then cut each piece in 3 pieces and place them snuggly next to each other in the lined deep dish pan, seam side down.
- Repeat with remaining filo pastry sheets until the large pan is full. Pour the remaining butter (if any) over top of the pastry.
- Bake in the oven for 1 hour until golden brown, keeping an eye on the baklava to ensure it doesn't get too dark (if it starts getting dark, place a sheet of aluminium foil lightly on top of the baklava dish while in the oven which will prevent burning).
- Let baklava cool completely before starting the syrup.
- To prepare the syrup, combine the sugar, water and cinnamon in a saucepan on medium heat. Boil for 5 mins then add the lemon juice, boil for another 5 mins and pour the hot syrup evenly on top of the cooled baklava.
- Let the baklava sit for at least 2-3 hours to soak up the syrup.

Rice Paper Baklava (GF)

A nice healthy treat!
GF, raw, vegan, plus can be sugar free and diary free too.
Best to enjoy the cake on the same day it's made.
Serves 6-8
Ingredients:
- 75g Hazelnuts, chopped into small granules (but not as far as hazelnut meal)
- 75g Pistachios, chopped into small granules (but not as far as pistachio meal)
- 500ml Almond Milk (sweetened preferred but up to you)
- 1/2 tsp Rosewater
- 1 Packet of Rice Paper
- Seeds of half a Pomegranate
Instructions:
- In a bowl, combine the almond milk and rosewater.
- Take a springform cake tin and lined it with plastic wrap, hanging quite a bit over the sides (in order to cover the cake after it's assembly has been finished).
place the first sheet of rice paper.
- With a spoon, evenly top the sheet of rice paper with 2 tbsp of the rosewater milk mixture.
- Place another sheet of rice paper overtop.
- Repeat with another 2 tbsp of rosewater milk mixture and another rice paper sheet.
- Then, after adding the milk, sprinkle a third of the hazelnut granules across the rice paper sheet.
- Repeat the above steps with three more rice paper sheets then alternate with a third of the chopped pistachio.
- Repeat the above until all the nut granules have been used and cover with another 3 rice sheets as above with the rosewater milk mixture.
- Top the last rice paper sheet with the pomegranate seeds and cover up the cake with the remaining plastic wrap.
- Refrigerate for at least an hour. Serve chilled.

Mhancha Moroccan Almond Pastry

Serves 8-10
Ingredients:
- 16 Filo Pastry Sheets
- 1 Egg yolk + 1 tbsp cold water
- 80g Unsalted Butter, melted
- 150g Honey, warmed
- Icing sugar, ground cinnamon, toasted white sesame seeds - for dusting and garnish
Ingredients (Almond Filling):
- 500g Blanched Almonds
- 100g Caster Sugar
- 2 tbsp Orange Blossom Water
- 150g Unsalted Butter
- 1 Egg yolk
- tsp Ground Cinnamon
Instructions:
- Preheat oven to 200C / 180C fan-forced.
- Make almond filling. In a blender, combine almonds and sugar into a paste. Add
orange blossom water and combine well.
- In a small saucepan, heat and combine filling's butter and almond paste until
slightly darker. Remove from heat and cool completely.
- Once cooled, mix in the egg yolk and cinnamon. Blend until it becomes a firm dough.
- Shape dough into 8 x 30 cm long logs, about 3 cms thick.
- Cover these with a towel to keep them from drying out and set aside in the fridge.
- Take out the filo sheets and cover as well with a towel. Leave on the counter top.
- Working with the first filo sheet, place on the countertop, brush it's surface
lightly with egg yolk mixture, then place another sheet overtop.
- Place 1 almond paste log along one end and roll pastry to enclose. Set aside, cover
with a towel.
- Repeat the last two steps with the remaining sheets and almond logs.
- In a round oven pie tray, shape the logs into a tight spiral, pressing ends
together to make one large spiral.
- Brush with melted butter, coat evenly.
- Bake for 20 mins until golden.
- Brush with warm honey. Cool completely then dust with icing sugar, cinnamon, and toasted sesame seeds.

Cinnamon Toast Bites
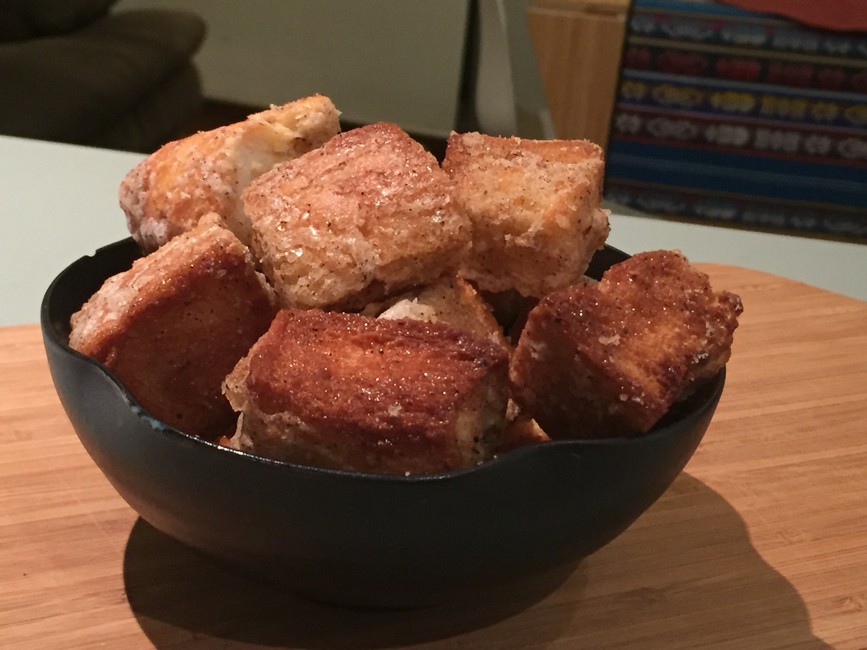
Time to make : 1 hour
Makes about 4 cups or more
Best enjoyed on the same day it is made.
Ingredients:
- 450g Challah or Brioche Bread, sliced into 1 x 1 inch cubes
- 1 Cup (250g) Unsalted Butter
- 1 Cup Sugar
- 1-2 tbsp Ground Cinnamon
- 1 tsp Vanilla Extract or Paste
- 1/8 tsp Salt
Instructions:
- Preheat oven to 375F / 190C.
- On baking tray, lined with parchment paper, arrange bread cubes in a single layer and bake for about 20 mins, tossing mid way, until completely dry. Reserve baking sheet.
- Meanwhile, in a small saucepan over medium heat, melt the butter and then whisk in sugar and 1/2 cup of water.
- Continue to cook until sugar is dissolved.
- Whisk in cinnamon, vanilla and salt.
- Transfer butter mixture into a large bowl.
- Add and toss bread cubes so they are coated with the mixture.
- Line the baking tray with the baking sheet, and return the coated bread cubes in one layer. Discard remaining mixture.
- Bake bread for 5-10 mins. Turn the bread to bake on the other side and continue baking for another 5-10 mins until dry, caramelized and golden.
- Let cool for 5-10 mins then store in an airtight container until ready to serve.

Monkey Bread
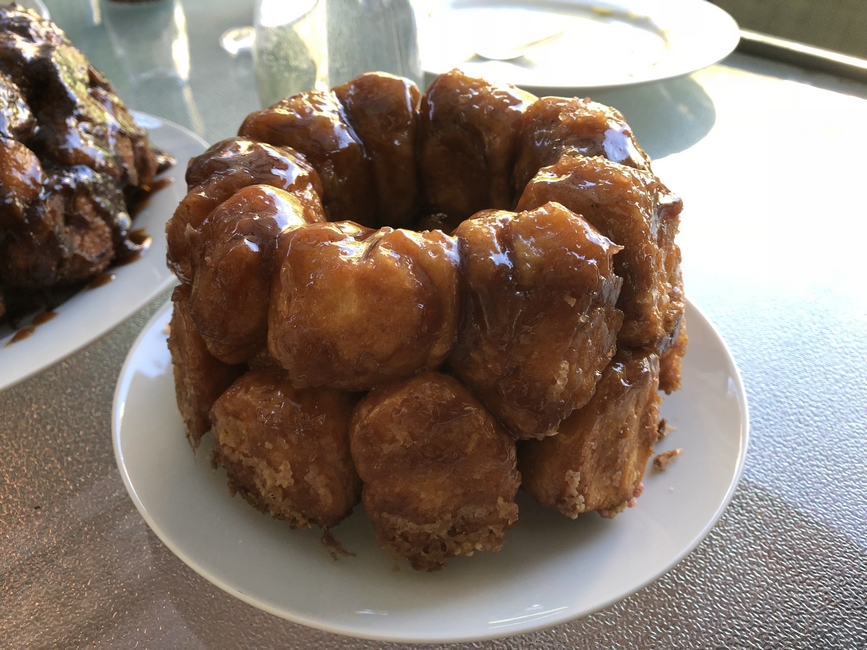
Serves 10.
Ingredients:
- 1 tsp Vegetable Oil
- 1/4 Cup Water, warm 100F
- 2.5 tbsp Active Dry Yeast (Check Expiry)
- 3-3.5 Cups All Purpose Flour
- 1 tsp Salt
- 1/2 tsp Vanilla
- 3 tbsp Caster Sugar
- 1 Large Egg
- 2 tbsp Butter, Melted
- 3/4 Cup Milk, warm 100F
Ingredients (Sugar Spice Mixture):
- 2 Cups Brown Sugar
- 3 tbsp Ground Cinnamon (add more as desired)
- 1/2 tsp Ground Allspice or Nutmeg
- 1/2 Cup Unsalted Butter, melted
Instructions:
- Lightly grease a 10 inch crown cake pan (bundt pan) with vegetable oil. Set aside.
- In a large bowl, combine yeast and warm water.
- Let stand for 2-5 mins until it starts to foam.
- Stir in 1 cup of the flour, along with the salt, sugar, vanilla, egg, 2 tbsp melted butter and warmed milk.
- Mix thoroughly until dough is smooth.
- Add the remaining flour, while continuing to mix the dough. Knead for 5 mins more.
- Cover the dough in the bowl with a damp towel. Let rest for 30 mins.
- Meanwhile, in a small bowl, make the sugar spice mixture by combining the brown sugar, cinnamon and allspice.
- Place the melted butter in a separate small bowl next to it.
- Turn out dough on a lightly floured counter top.
- Taking a knife, cut a small piece of dough and roll it to make a walnut sized ball of dough.
- Dunk the dough ball into the butter and then the spice mix.
- Place the coated dough ball into the crown cake pan.
- Repeat using up all the dough.
- Cover the crown cake pan with the towel again and let bread rise for an hour until it has expanded to double it's size.
- 10-20 mins before the dough is ready, preheat the oven to 175C (155C with fan).
- Bake for 30-35 mins. Bread will spring back when lightly pressed.
- Remove the pan from the oven and let it cool down for 10 mins, before turning it upside down on a serving plate.
- Eat immediately as it is best warm and gooey.
Source: https://bakingbites.com/2009/01/classic-monkey-bread/

Africaans Koeksisters (Glazed Braided Fried Pastries)
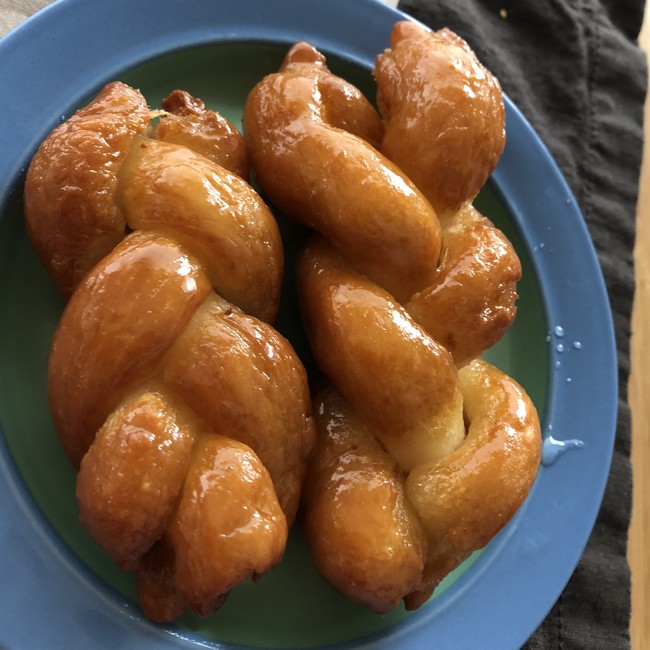
Ingredients (dough):
- 240g Flour, sifted
- 4 tsp Baking Powder
- 1/2 tsp Salt
- 2 tbsp Butter
- 1/2 Cup Buttermilk
- Canola oil for frying
Ingredients (syrup):
- 500g Sugar
- 1 Cup Water
- 1/8 tsp Cream of Tartar
- A pinch of salt
- Grated peel and juice of 1 Lemon
- 2 inches of bruised peel ginger slices
Instructions:
- Start by preparing the syrup by throwing all the ingredients in a saucepan. Set to
medium heat and cook until all the sugar has dissolved.
- Simmer for a few more minutes.
- Remove from heat and let cool as quickly as possible. When feasible place it in
the freezer to be very cool.
- Proceed to the dough. Sift dry ingredients together.
- Blend in butter.
- Pour in the buttermilk and milk into a soft dough.
- Knead well. Then set aside, covered by a towel, for 15 mins.
- Roll the dough to 5mm thickness wide and 7cm long
- Create braids with three strips, pressing the ends tightly so that they don't fall
apart when being fried.
- Prepare the oil fryer. Heat until 170C. Prepare a draining rack next to it. And
ensure that the syrup is very cold.
- Deep fry the koeksisters in the hot oil until golden brown and cooked through.
- Drain quickly and then immediately place them into the ice-cold syrup.
- Once they are saturated with the syrup, transfer them to another drying rack.

Lebanese Znoud El Sit (sweetened cream-filled pastry, soaked in syrup)

Ingredients:
- 500g Phyllo pastry roll, thawed
- 750ml Vegetable Oil for frying
- 2 tbsp Pistachios, toasted & coarsely ground, for garnish
- 2 tbsp Orange Blossom Jam, optional, for garnish
Ingredients (Ashta - Sweetened clotted cream filling):
- 2 Cups Milk
- 2 tbsp Cornstarch
- 1 tbsp Fine Semolina
- 1/4 tsp Mastic Gum, optional
- Note : Alternative more traditional Ashta recipe below.
Ingredients (Paste to seal pastry):
- 1/3 Cup Flour
- 1/3 Cup Water
Ingredients (Orange Blossom Water Syrup):
- 2 Cups Sugar
- 1 Cup water
- 1 tbsp Lemon Juice
- 1 tbsp Orange Blossom Water
Instructions (Sugar syrup):
- In a medium sauce, over medium-high heat, bring the sugar, water and lemon juice to a boil.
- Reduce heat to low and simmer for 6 minutes.
- Remove from the heat. Add the orange blossom water and allow to cool down completely.
Instructions (Ashta):
- In a medium saucepan, over medium heat, bring the milk, cornstarch and semolina, to a boil, while whisking constantly and until it thickens. Set aside to cool down.
Instructions (Sealing paste):
- When the cream filling and sugar syrup has totally cooled down, prepare the paste to seal the rolls. In a small bowl, whisk together the flour and water. Set aside.
Instructions (Assembly):
- Delicately unwrap and rollout the phyllo pastry.
- With a pair of scissors, cut the phyllo sheets into 3 equal stalks (each stalk is approx 30x7cm). To prevent drying, cover them with a kitchen towel.
- Lay your first phyllo strip vertically on a counter top, then place another phyllo strip horizontally over the vertical strip, creating a cross-shaped form.
- Place a heaping teaspoon of the ashta at the center of the cross.
- Fold the ends of the horizontal layer over the ashta.
- Then roll the vertical layer over the ashta, brush the end with the sealing paste and continue rolling, creating a cylinder-shaped roll.
- Continue making rolls with remaining ashta and phyllo pastry.
- In a deep pan, heat the oil to an adequate frying temperature and fry the Znoud el Sit rolls, in batches, to a crisp and golden color.
- Remove each with a slotted spoon and dip for a few seconds in the sugar syrup.
- Remove with a spoon, arrange on a serving dish and garnish with ground pistachios and the orange blossom jam.
- Serve warm or cold.
Instructions (Alternative Ashta Recipe):
- Ingredients: 1.5 Cups Whole Milk, 1.5 Cups Half and Half Milk, 1/4 tsp Rosewater, 1/2 tsp Orange Blossom Water, 1/4 tsp Freshly squeezed Lemon Juice plus more if needed, 1 pinch sugar (optional).
- In a saucepan, on medium heat, bring the milk, half-and-half and sugar to a boil while continuously stirring. Turn off heat and mix in lemon juice - The milk will immediately start to clot. Add the rosewater and orange blossom water, stir well. Using a small strainer, start collecting the clotted cream from the surface and place
them into a separate larger strainer. Continue the collection of clotted cream until the milk in the saucepan is nearly clear. You may need to add a few more drops of
lemon juice to induce more clotting but don't add too much. When the collected ashta cools down to room temperature, it is ready to use in sweets or with fruit cocktails
with honey and walnuts. Ashta lasts 2-3 days in the fridge.

Banana & Chocolate Dumplings in Maple Caramel Sauce
Makes 12 small dumplings.
Ingredients:
- 1 Ripe Banana, in 1cm slices
- Dark Chocolate Bar, cut into 12 cubes
- 6 Large Sheets of Phylo Pastry
- Whipped cream or Ice cream, to serve
Ingredients (Maple Caramel Sauce):
- 20g Butter
- 1/2 Cup Brown Sugar
- 1/4 Cup Maple Syrup
- 1 tbsp Lemon Juice
Instructions:
- Cut a sheet of phyllo pastry into 6 wide long strips and 6 x 10 cm long strips.
- Take 1 wide and 1 short strip and make a cross at the top.
- place a piece of banana and chocolate on the cross.
- Fold the sides of the small strip over the banana and chocolate.
- Roll the second long strip around the banana bundle so the bundle is covered in
phyllo.
- Make the syrup. Place the sugar, maple syrup, lemon juice and 1 cup cold water in a large saucepan over low heat. Cook stirring 2-3 mins, until sugar dissolves.
- Bring to a boil and then reduce heat to medium.
- Gently add the dumplings to the syrup to partly submerge them.
- Simmer, covered for 15 mins.
- Serve warm with whipped or ice cream

Profiteroles with chocolate cream (inspired by Mendl's "Courtesan au Chocolat")
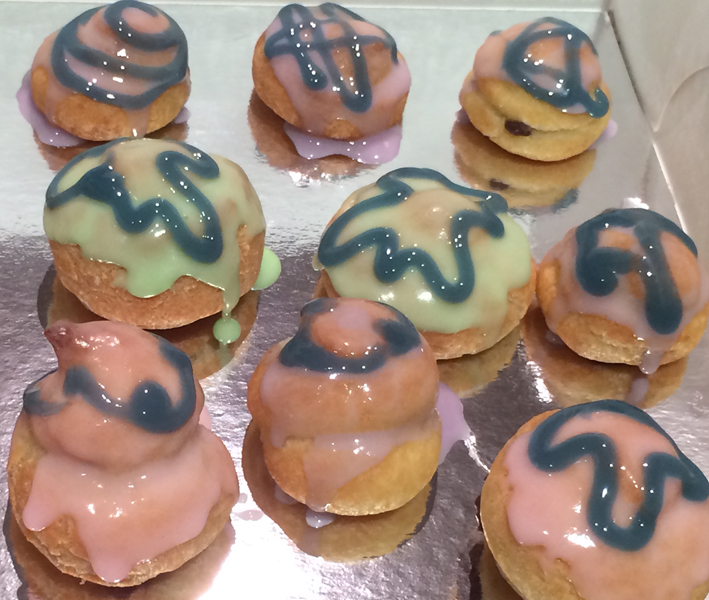
Makes about 25 profiteroles
Ingredients (Chocolate Creme):
- 1.5 Cup Whole Milk
- 50g Dark Chocolate
- 3 Egg Yolks
- 1/4 Cup Sugar
- 2 tsp Cocoa Powder
- 1 tbsp Flour
- 3 tsp Cornstarch
Ingredients (Choux Pastry):
- 1 Cup Plain Flour, sifted
- 1 Cup Fresh Water
- 125g Butter
- 4 Eggs, lightly beaten
- Pinch of Salt
- 1 tsp Sugar
Ingredients (Icing):
- 1 tbsp Milk
- 1 Cup sifted Pure Icing Sugar
- Food colouring, less than a drop (use toothpick to add colour)
- Icing writer - for decoration (through a prebought tube or you can make your own with a very small hole in the piping bag)
Instructions (Chocolate Creme):
- Heat the milk gently and add chocolate, stirring to melt the mixture in a rich, almost steaming chocolate milk.
- In a separate bowl, combine whisked egg yolks, flour, sugar, cocoa and cornstarch into a smooth mixture.
- Add half the chocolate milk mixture to the bowl with the egg mixture, a little at a time, stirring constantly.
- Then add this mixture back into the rest of the hot milk pot, stirring over gentle heat for a few minutes until the mixture thickens to a custard.
- Remove from heat, let cool then cover and chill. Mix intermittently to prevent a crust from forming.
Instructions (Choux):
- Preheat ovent to 180C.
- In a medium sized saucepan, bring the water, butter, salt and sugar to a boil.
- Remove from the heat and mix in the flour.
- Return to the heat for a few mins, while stirring constantly. Cook until the dough forms a single lump.
- Allow to cool to luke warm, to keep the eggs from cooking when stirred in.
- Meanwhile, line 2 baking trays with baking papers.
- Lightly beat the eggs, stir them in a little at a time, gradually, with an egg beater or electric mixer, or a strong wooden spoon (until dough is smooth and falls slowly from a spatula when raised in the air).
- Place the choux dough into a piping bag. Pipe dough into large tablespoon sized dollops.
- Bake each tray, one at a time for about 25-35 mins.
- Remove from the oven and make a small piercing in the choux to allow the steam to escape and return to the tray, hole side up, to cool.
Instructions (Icing & Assembly):
- Prepare the icing sugar by mixing milk, vanilla and icing sugar to achieve the desired consistency, a very thick opaque icing paste. Separate into 4 bowls and add food colouring (teeny amounts) eg.pink, lavender, pale green, leaving the last one white.
- Spoon the chilled chocolate creme into a pastry bag and pipe into the pastry balls, though the pre-made hole.
- Dip each of the pastry balls in the icing, to the midline, and place icing side up on a small tray.
- Let dry and then decorate as desired.

Chocolate Eclairs with Patisserie Cream
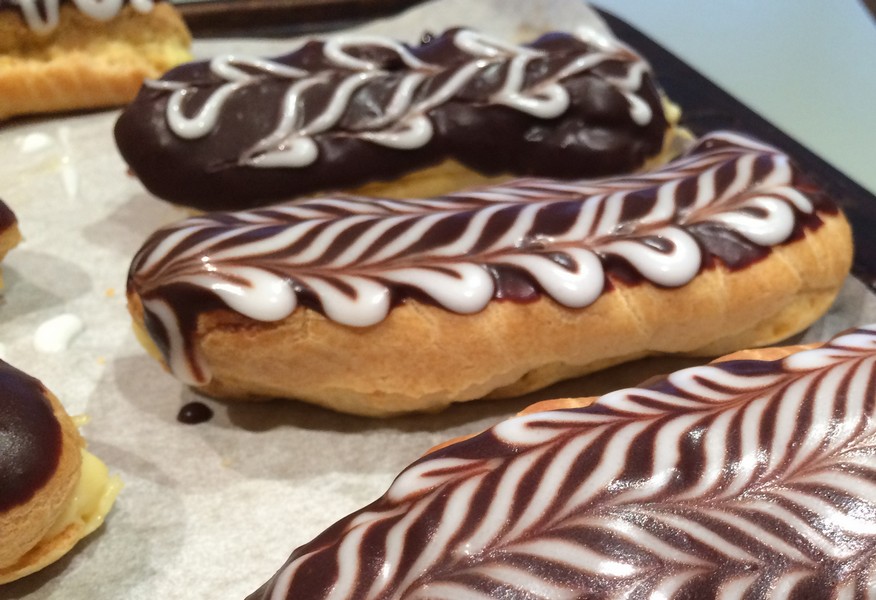
Makes about 20 eclairs
Ingredients (Creme Patisserie):
- 375ml (1.5 Cups) Milk
- 1 tsp Vanilla
- 3 Egg Yolks
- 1/3 Cup Caster Sugar
- 1/3 Cup Plain Flour, sifted
Ingredients (Pastry):
- 1 Cup Plain Flour, sifted
- 1 Cup Fresh Water
- 125g Butter
- 4 Eggs, lightly beaten
- Pinch of Salt
- 1 tsp Sugar
Ingredients (White Icing):
- 1/2 tbsp Milk
- 1/2 Cup sifted Pure Icing Sugar
- Small Piping Bag
Ingredients (Chocolate Icing):
- 100g Dark Chocolate
- 15g Butter
- Small Piping Bag
Instructions (Creme Patisserie):
- In a medium saucepan, over low heat, warm the milk and vanilla.
- In a separate heatproof bowl, whisk yolks and sugar until combined.
- Whisk flour into the yolk mixture.
- While whisking vigourously add the heated milk mixture. Return to the saucepan.
- Cook over low heat, while continuing to whisk, until thickened
- Transfer into a clean heatproof bowl, let cool for 10 mins, then cover mixture directly with plastic wrap and chill to set for at least 1 hour or more.
- Spoon the chilled creme into a large piping bag fitted with a long nozzle with a large circular hole for filling the eclairs.
Instructions (Pastry):
- Preheat ovent to 180C.
- In a medium sized saucepan, bring the water, butter, salt and sugar to a boil.
- Remove from the heat and mix in the flour.
- Return to the heat for a few mins, while stirring constantly. Cook until the dough forms a single lump.
- Allow to cool to luke warm, to keep the eggs from cooking when stirred in.
- Meanwhile, line 2 baking trays with baking papers.
- Lightly beat the eggs, stir them in a little at a time, gradually, with an egg beater or electric mixer, or a strong wooden spoon (until dough is smooth and falls slowly from a spatula when raised in the air).
- Place the dough into a piping bag (no need for a special nozzle). Pipe dough into 10cm x 1.5cm long lengths.
- Bake each tray, one at a time for about 25-35 mins.
- Remove from the oven and make a small piercing in each end of the eclairs to allow the steam to escape and return to the tray to cool.
Instructions (White and Chocolate Icing, Final Assembly):
- Prepare the white icing sugar by mixing milk and icing sugar to achieve the desired consistency, a very thick opaque icing paste. Spoon the icing into a very small piping bag and set aside.
- Prepare the chocolate icing sugar by placing the chocolate and butter in a bain-marie over medium heat until just melted.
- While the chocolate icing is colling to room temperature, pipe the creme patisserie into the eclairs, though the pre-made hole.
- Dip each of the eclairs in the chocolate icing until the top is fully covered, up to the midline, and place icing side up on a small tray.
- Immediately after dipping, cut a small tip on the end of the white icing piping bag and pipe a small zigzag up the length of the eclairs.
- Use a toothpick to make a line on the right side from bottom of the eclair to the top. Then clean the toothpick and use the same one to make another parralell line, 1cm apart, from the top to the bottom. Place the eclair in the fridge immediately to chill for at least 30 mins.
- Serve cool or at room temperature

Brandy Snaps

Nice ginger taste in these!
Makes 1.5 dozen
Prep = 40 mins. Cooking = 25 mins.
Ingredients:
- 50g Butter, chopped
- 1/3 cup (70g) Brown Sugar
- 1/4 cup (60ml) Golden Syrup
- 1/3 cup (50g) Plain Flour
- Zest of 1/2 Lemon + 1 tsp Lemon Juice
- 1 tsp Ground Ginger
- 2/3 cup (160ml) Thickened Cream
- 2 tsp Brandy (optional - can also use another flavouring)
- 1 tbsp Icing Sugar Mixture
Instructions:
- Preheat oven to 180C. Line a tray with baking paper.
- In a small saucepan, combine brown sugar, butter and golden syrup. Cook over medium heat, stirring, for 2-3 mins or until butter melts and sugar has dissolved. Set pan aside for 5 mins to cool slightly.
- Add the flour, ginger and lemon zest & juice to the mixture. Stir to combine.
- Drop four teaspoons of the mixture on to the tray, spaced well apart.
- Bake for 5mins and have spread to 10cm in diameter and have turned a dark golden colour.
- Remove from oven and allow to cool for 1 min.
- Then, working quickly, use a palette knife to lift each one and wrap them around the handle of a wooden spoon. Leave to set for 1 min, then gently slip off the spoon and transfer to a wire rack. Repeat with remaining mixture.
- To make the filling, use an electric mixer to whisk the cream, brandy and icing sugar in a small bowl until soft peaks form. Spoon cream into a piping bag fitted with a flutted nozzle.
- Pipe the cream in each brandy snap and serve immediately.

Italian Lemon & Pistachio Cannolis
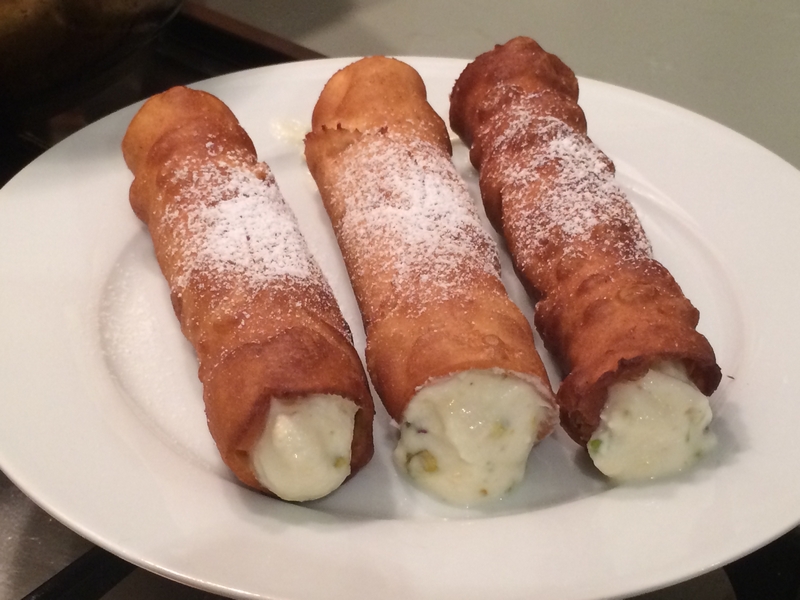
Makes approx 30 cannolis.
Ingredients (Cannoli Tubes):
- 2 cups (300g) Plain Flour, sifted. Plus extra to dust.
- 50g Caster Sugar
- 1/4 tsp Bicarbonate of Soda
- 1/2 tsp Ground Cinnamon
- Finely grated zest of 1 Lemon
- 1/4 cup (60ml) Marsala Wine
- 60g Unsalted Butter, melted
- 1 Egg, separated
- Vegetable or Canola Oil, for deep frying
Ingredients (Filling):
- 400g Ricotta
- 150g Marscarpone
- 150g Thick Greek-style Yoghurt
- 1 Cup (150g) Icing Sugar, plus extra for dusting
- Finely grated zest of 2 lemons and juice of 1 lemon
- 1/2 cup (75g) Pistachios, very finely chopped
Instructions:
- In a large bowl, combine sifted flour, caster sugar, bicarb soda, cinnamon and a pinch of salt.
- Make a well in the centre of the combined dry ingredients and add the lemon zest, Marsala, butter and egg yolk(set aside the egg white).
- Mix until thoroughly combined. Then turn mixture out onto a lightly floured surface and knead for 2-3 mins until smooth. Cover the dough with an upturned bowl and set aside for 20mins to rest.
- Set up pasta machine at one end of a long countertop (you'll need 1 meter of space). Lightly dust countertop from one end to the other.
- In the meantime, prepare a deep frying dish and start heating the canola, sunflower or vegetable oil. Heat to 180C.
- While oil is heating, divide dough into 3.
- Take 1 piece of dough and return the other two back underneath the bowl.
- With a rolling pin, flatten this first piece into a 5mm thick rectangle.
- Pass the flattened dough through the pasta machine on the widest setting. Fold it in half and roll it through again.
- Reduce the setting by one notch and pass it through again. Then again. Continue rolling until you've reached the thinnest setting.
- Lay out the rolled dough on your lightly-floured surface and use a 10cm round cutter to cut out discs.
- Wrap the discs around the metal cannoli tube and brush the joined bit of the pastry with a dab of eggwhite to seal it closed.
- Repeat with the rest of the dough until you've covered all cannoli tubes.
- Check that the oil has reached 180C. Then gently lower the cannoli tubes into the hot oil and cook for about 1 min until golden and crisp. Prepare a plate with paper towel to drain when ready. Use tongs to carefully remove each tube, draining any excess oil back in the pan, then place them on the paper towels to drain further.
- Once cooled, squeeze each tube and remove the tube from the cannoli pastry.
- Repeat the process with the remaining dough, making sure that the oil remains at 180C.
- To make the filling, in a medium-sized mixing bowl, beat the ricotta, mascarpone, yoghurt and sifted icing sugar together until smooth. Fold in lemon zest, juice and 25g of the ground pistachios (saving the rest for serving).
- Scoop the mixture into a piping bag and pipe into each cooled cannoli shell.
- Scatter the remaining pistachios over the ends of each cannoli. Dust the cannolis with icing sugar to serve.

Italian Ricotta-filled Sfogliatelle Pastries

This is a sneaky short cut version but the result should be just as good and plus you'll have more energy to eat it! (As there is no need to make the phyllo pastry if you can buy it in stores).
Makes 1-2 dozen pastries.
Ingredients:
- 1 Package of Phyllo Pastry
- 175g Unsalted Butter
- 100g Lard
- 150ml Milk
- 2/3 Cup (150g) Caster Sugar
- 30g Cornflour or Cornstarch
- 1 Egg + 2 Egg Yolks
- Finely grated zest & juice of 2 Lemons
- 250g Ricotta
- 100g Glace Fruit such as Oranges, Lemon and Cherries, finely chopped
- Pure Icing Sugar, for dusting
Instructions:
- Start with the filling. Heat the milk and 100ml water in a saucepan until bubbles form at the edge. In a separate bowl, whisk the caster sugar, cornflour, whole egg, extra yolks, lemon zest, lemon juice and a pinch of salt.
- Pour the hot milk into the lemony mixture, whisk until smooth, then return it to the pan. Continue to cook over medium heat until tit's the thickness of custard.
- Then remove from heat and pour into a clean bowl.
- Beat in ricotta and fold in the candied peel and glace fruit (try to prevent it from turning pink from the cherries).
- Leave it to cool, then cover with plastic wrap and place it in the fridge to chill until needed.
- In a microwave safe bowl, beat the butter and lard together until smooth, then heat it in the microwave for a few seconds until spreadable with a brush. Set aside.
- Take the phyllo pastry out of the fridge and cut the roll into 3 rolls. Place 2 of the 3 rolls back into the fridge to keep cool.
- Meanwhile, roll out the small roll and brush with the butter mixture until it is completely covered.
- From one end of the pastry, start rolling it up again as tightly as possible. Stop rolling when you get 2cm from the end and set aside.
- Brush the second roll with butter and lard (warm up in the microwave if it is getting too hard). Lay the first roll on top of the stretched pastry at one end. Roll up the first log into the second pastry portion so that you end up with a bigger roll, stopping 2cm from the end. Set aside.
- Repeat with the third roll, so that you have one large roll.
- Cover with plastic wrap and chill for only 1 hour (this is important as you don't want the butter to become too firm).
- Preheat the oven to 200C and line two baking sheets with baking paper.
- Cut the ends off the log to ensure straight edges. Then cut the roll into 1cm thick slices. Push your thumb into the middle of each slice and use your fingers to make a cone shape, being careful not to separate the layers.
- Fill the cone with the ricotta filling so that you can press the open end to seal it closed. Lay it on the lined baking tray. Repeat with remaining slices.
- Bake for 30 mins or until golden and crisp.
- Transfer to a wire rack to cool then dust with icing sugar.

French Almond Croissants

Makes 20 small croissants.
Ingredients (for the croissant):
- 1 x 7g Sachet Dried Yeast
- 75ml Warm Water
- 50g Bread Flour, sifted
- 75ml Cold Milk
- 2 Free-range Egg Yolks
- 50ml Cold Double Cream
- 25g Caster Sugar
- 300g Bread Flour, sifted
- 250g Very Cold Butter, cut into 2cm cubes
- 1 Free Range Egg Yolk, for the egg wash
- 60g Almond Flakes
Ingredients (for the filling):
- 150g Butter, softened
- 1/2 Pure Icing Sugar, sifted
- 4 tbsp Flour, sifted
- 2 Cups Almond Meal
- 1 tsp Almond Essence
Instructions:
- Dissolve the yeast in the water and flour in a small bowl to make the starter.
- Rest the starter in a warm place until bubbling (approx 40 mins).
- Add the milk, egg yolks, double cream, sugar.
- Blend the bread flour and butter until it makes a mixture resembling sand.
- Fold into the yeast mixture with a spatula and work the dough into a ball with the spatula (try to avoid touching the dough as it will melt the butter).
- Roll out the dough to a long rectangle, about 1 cm in thickness, adding a little bit of flour to prevent sticking if needed.
- Fold into thirds, then roll out again. Fold into thirds again and wrap in plastic wrap and chill for 30 mins in the fridge.
- Give the dough a quarter turn, roll out to a rectangle and fold into thirds again. Wrap and chill for another 30 mins.
- Third time, make a quarter turn again and roll dough to a rectangle and fold into thirds one final time. Wrap and chill for 30 mins.
- Meanwhile, make the almond filling. Cream the butter and icing sugar until pale and fluffy, then mix in the remaining filling ingredients and blend well.
- To make croissants, roll out the dough to form another rectangle about 24cm wide by 12 cm long.
- Cut out isocoles triangles, place a tsp of the filling at the base of the triangle and roll it up to form a croissant shape, curling the ends inwards.
- Place each on a baking tray lined with baking paper. Place the trays in a warm, humid place and let the croissants rise until they have doubled in size, about 40 mins.
- 20 mins before they are ready, preheat the oven to 170C and prepare the egg wash by lightly beating an egg in a small bowl.
- Lightly brush the croissants with the egg wash, top with almond flakes and bake for 12-14 mins.

Classic American Vanilla Marshmellows
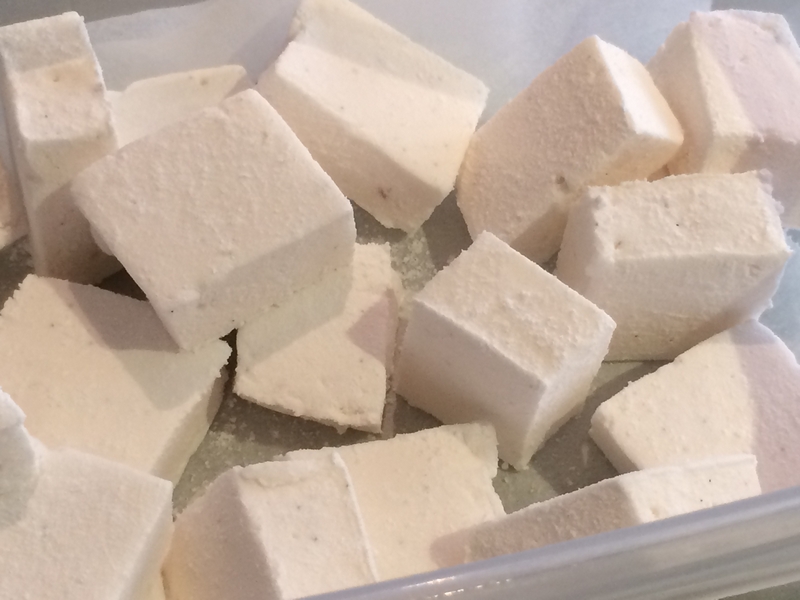
Makes 60 small Marshmellows
Prep = 15 mins + 3 hours of cooling. Cooking = 20 mins.
Ingredients:
- 185ml + 190ml Cold Water
- 40g (1/4 cup) Gelatine Powder
- 430g (2 cups) Caster Sugar
- 1 tbsp Glucose Syrup
- 2 Vanilla Beans, split & seads separated
- 2 Egg Whites
- 1/2 - 1 Cup Icing Sugar (Use pure icing sugar for Gluten Free marshmellows - makes no difference in the end product)
Instructions:
- Grease and line with baking paper a 20x30cm deep baking pan.
- Dust with sifted icing sugar to coat the baking paper.
- In a bain marie, place 185ml (3/4 cup) water.
- Whisk in gelatine powder.
- Heat the mixture over the bain marie and continue stirring, until the gelatine dissolves.
- Remove from heat, whisk in the vanilla seeds. Set aside while whisking occasionally.
- In a separate medium sized saucepan, stir sugar, glucose syrup and 190ml cold water over medium heat until sugar dissolves. Bring to a boil. Reduce heat to low and simmer until the syrup reaches 127C (hard ball stage) on a candy thermometer.
- When syrup reaches 120C, beat egg whites in a clean, dry bowl until firm peaks form.
- Remove the syrup from heat once it reaches 127C.
- Very gradually beat on high both gelatine mixture and syrup into the egg white mixture. Beat until mixture is cooler to the touch.
- Pour or scoop mixture into prepared pan. Smooth top with a wet palette knife if/where needed.
- Refrigerate uncovered for at least 3 hours (or overnight) to set.
- Prepare a long baking paper sheet and cover with sifted Icing Sugar. Loosen the edges of the marshmellows by running a wet knife along the edge, then turn upside down on top of the baking paper sheet with icing sugar.
- Prepare a very large bowl with 2 tbsp sifted icing sugar to place the cut marshmellows.
- Then remove the baking paper from the top of the marshmellow slab and use kitchen scissors to cut the marshmellow slab into small pieces (any shape can be made.. you could also use slightly moistened cookie cutters here for more precise shapes).
- Then place the pieces of marshmellows into the bowl to ensure you can get icing sugar all over the marshmellow so that no sticky bits remain. Remove excess icing powder and set aside in a storage container.
- You can store these for a few days before they start getting dry.
Alternatives
- Uses : You can also pipe the mixture over cakes or cupcakes.
- Appearance :
-Add food colouring to the mixture.
-Roll in dessicated coconut instead of icing sugar for an alternative coating.
-Mix in a thick caramel or jam. Note this option looks great but is quite messy as caramel tends to fall to the bottom. Best thing to do is to wait until mixture thickens while it is cooling (about 20-30 mins), then swirl in caramel.
- Flavours : Swap out water for fresh juice (eg. Passionfruit or Pineapple) by reducing their juices to 185ml of liquid and then swapping out the water for the fruit juices instead.

South American Caramel (Dulce de Leche)
Prep Time 5 mins + Cook Time 3 hrs
Makes 1 Cup
Ingredients:
- 1 Litre Whole Milk
- 340g (~1.5 cups) Caster Sugar
- Seeds from 1 Vanilla Bean
- 1/2 tsp Baking Soda
Instructions:
- In a large soup pan, combine milk, sugar and vanilla bean seeds over medium heat.
- Bring to a simmer, stirring until the sugar has fully dissolved.
- Then mix in the baking soda.
- Reduce the heat to low and cook uncovered at a bare simmer. Stir occasionally to prevent the base from burning but do
- not reincorporate the foam that accumulates at the top.
- Continue to cook until the mixture has a dark caramel colour and has reduced to about 1 cup, approx 2.5-3 hrs.
- Strain the mixture and store in a sealed container for up to 1 month.

Rocky Road with a Christmas Twist
A rocky road like no other. Lots of amazing flavours and textures in here.
Makes 24 squares
Ingredients:
- 250g Dark chocolate, cut into very small pieces
- 150g Milk chocolate, cut into very small pieces
- 175g Butter, softened at room temperature
- 4 tbsp Golden Syrup
- 200g Amaretti biscuits
- 150g Brazil nuts
- 150g Red glace cherries, chopped into bits approx a quarter of the original
- 125g Mini Marshmellows (preferably just the white ones)
- 1 tbsp Brandy
- 1 tbsp Icing Sugar, for dusting
Instructions:
- Line a 20cm square baking tin (bottom and sides) with baking paper. Set aside.
- In a heavy based pan, over low heat, melt and combine chocolate, butter and golden syrup. Remove from heat. Mix in the brandy.
- Place amaretti in a freezer bag and with a rolling pin, bash them until you get coarse granules for a little crunch.
- In a separate freezer bag, do the same with the brazil nuts.
- In the chocolate mixture, fold in the amaretti and brazil nut crumbs, the cherries and marshmellows until completely coated.
- Tip into the prepared tray, flattening the surface as much as possibe. You can place a sheet of baking paper overtop and roll the side of a glass to help flatten it.
- Refrigerate for 2 hours until firm.
- Dust with icing sugar. Cut 6 columns x 4 rows to make 24 squares.
- Serve chilled or room temperature. Stores for up to 1 week in a cool place OR for up to 1 month in the freezer (thaw overnight before serving).

Italian Smoked Almond & Cranberry Panforte
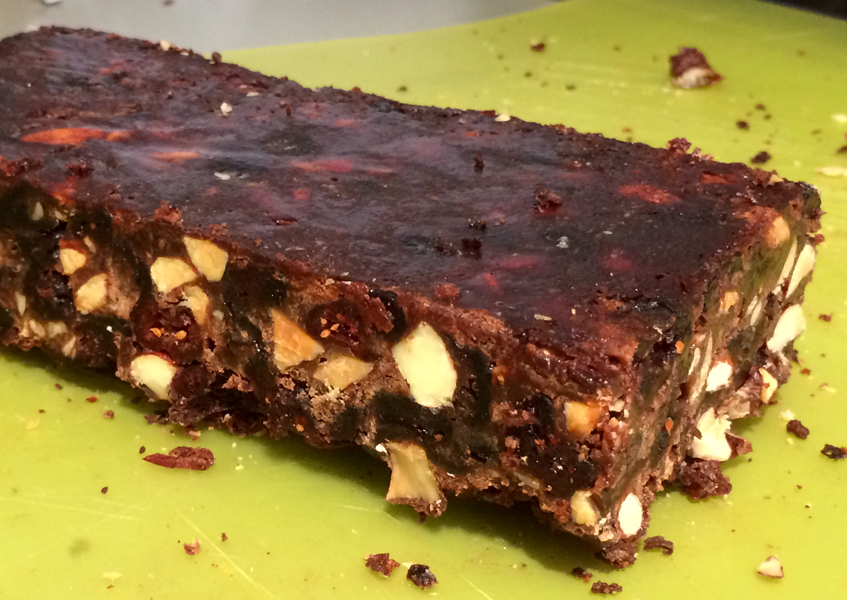
Ingredients:
- 2.5 Cups (400g) Dried Cranberries
- 1/3 Cup Bourbon or Brandy
- 3/4 Cup (110g) Plain flour, sifted
- 1 tsp Cinnamon
- 1 tsp All Spice
- 1.5 Cups (235g) Smoked Almonds, roughly chopped
- 120g Dark Chocolate, melted
- 3/4 Cup Honey
- 1 Cup Caster Sugar
- 1 tsp Vanilla Essence or the seeds of 1 vanilla bean
Instructions:
- Preheat oven to 160C.
- Lightly grease and line the base and sides of a 20cm round or square springform pan.
- Top with confectionery rice paper and set aside.
- In a medium saucepan over high heat, stir cranberries and bourbon frequently for 4-5 mins or until the fruit is plump.
- Set aside to cool slightly.
- In a large bowl, add flour, cocoa, mixed spice, almonds, chocolate and the cranberries mixture in a large bowl and stir until just roughly combined.
- In a small saucepan, combine honey, sugar and vanilla seeds over medium heat.
- Bring to a boil and cook for 2 mins or until the temperature reaches 118C on a sugar thermometer.
- Add the honey mixture to the cocoa mixture and stir until well combined (until you can't see any white flour)
- Spoon the mixture into the prepared lined pan and press to ensure full base is filled and top is even.
- Bake for 35-40 mins or until the panforte is set on the sides and slightly soft in the centre.
- Cool in the pan for at least 5 hours or overnight.
- Loosen the edges with a knife before removing and cutting into small cubes.
- Bring to room temperature (about 30 mins) before serving.
- Keep covered and chilled in the fridge, and it will last for up to 1 month.

Walnut and Raisin Semolina Halava
Ingredients:
- 2 3/4 Cups Water
- 3/4 Cups Raw Sugar
- 1/2 Cup Raisins
- 7 Tablespoon unsalted butter
- 1 1/4 Cups Coarse-grained semolina
- 1/3 Cup Walnut pieces
Instructions:
- Combine water, sugar and raisins in a large and deep sauce pan.
- At medium heat, dissolve the sugar. Bring to a boil, then cover with a lid and remove from the heat.
- Melt butter in another large & deep saucepan over low heat without letting it brown.
- Roast the semolina very slowly for 20 mins or more, with butter so that the grains don't burn. Allow the semolina to darken.
- Add the walnuts and the raisin sugar mixture. Maintain a low heat and mix regularly.
- Once the mixture has been fully absorbed, steam the finished halava over very low heat with a tight fitting lid for 5 mins to fluff up the grains.
- Then allow to sit covered for another 5 mins. Best served hot with cream or custard.

Home-made HoneyComb (aka Hokey Pokey)

Makes 2 Cups (or 125g)
Ingredients:
- 100g Caster Sugar
- 4 tbsp Golden Syrup
- 1.5 tsp Bicarbonate of Soda
Instructions:
- Prepare a large heatproof tray with baking paper. Set aside.
- In a cold large saucepan (such as one you'd use for soup), mix sugar and syrup together until they are combined.
- Without stirring further, place the pan on medium-high heat and let the mixture melt.
- Over 3 minutes, it will start to bubble and start to become golden.
- As soon as it starts to become golden, remove the pan from the heat and whisk in the bicarb soda (quickly and with only a few turns). The mixture will turn into a
whooshing cloud of gold.
- Immediately, pour the mixture on the prepared tray trying to flatten where you can.
- Now leave it to set for about 30 mins or more until it has fully cooled. Once cooled, break up the honeycomb slab into eatable pieces.

Cantonese Sesame Seed Balls
Makes 24 Balls
Ingredients:
- 1/2 Cup Wheat Starch (white not yellow)
- 1/2 Cup + 3/4 Cup Boiling Water
- 1/2 Cup Granulated Sugar
- 400 g Bag of Glutinous Rice Flour (about 3 1/4 Cups)
- 3/4 Cup Cold Water
- 1/2 Cup of Vegetable Shortening, at room temperature
- 500 g Can Lotus Nut Paste (sweetened! If not, add sugar), rolled into 24 small balls about 2 tsp each
- Cold Water for dipping during preparation
- 1 Cup of White Sesame Seeds
- Canola or Vegetable oil for deep frying
Instructions:
- Put wheat starch in medium mixing bowl. Add 1/2 Cup of boiling water. Mix well with wooden spoon.
- When cooled slightly, knead thoroughly with hands into ball. Set aside.
- In another bowl, stir sugar and 3/4 cup of boiling water until sugar dissolves. Add flour and cold water. Stir until combined. Then, using hands, work in lard, in pieces, and also add, in pieces, the wheat starch mixture. Knead into smooth dough that is no longer sticky (for about 5 minutes).
- Divide dough in half. Roughly shape each piece of dough into 12 inch logs. Cut each log into 12 pieces.
- Roll each piece of dough into a ball. Place small portion of lotus nut paste in centre. Gather edges of dough around filling; pinch to seal. Roll by hand into smooth ball. Repeat with remaining dough and paste.
- Fill shallow bowl with cold water. Fill second shallow bowl with sesame seeds. Dip each ball quickly in water, then roll in sesame seeds to cover.
- Heat several inches of oil in wok or large heavy sauce pan over high heat.
- Add balls, in batches of 6, or so,. Fry (and rotate) using slotted spoon to stir and flip, until the whole ball is golden brown (for about 5 mins). Suggest to taste test first one to get used to how much it needs to be cooked. (Dough should be cooked inside).
- Serve warm.

Dark Chocolate Shortcrust Pastry
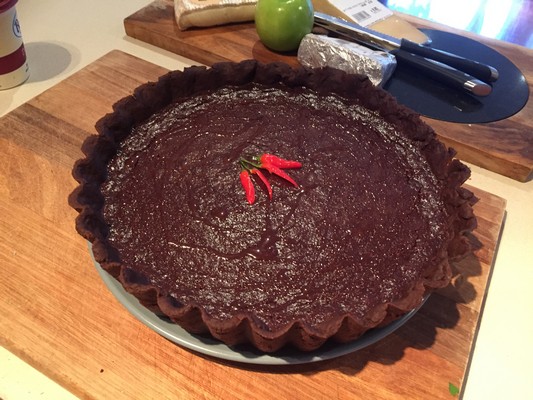
Pastry base for a 22cm round tart pan or 24cm square pan.
Ingredients:
- 2 tbsp Cocoa Powder, sifted
- 2 tbsp Pure Icing Sugar, sifted
- 200g plain flour, sifted
- Pinch Salt
- 1 Egg Yolk
- 150g Unsalted Butter, cold and diced
- 1 tbsp Vodka + more if needed to bring the dough together
Instructions:
- In a food processor, blend the cocoa powder, icing sugar, flour, salt and chilled butter until the mixture resembles coarse sand.
- In a large bowl, knead the cocoa mixture with 1 tablespoons of the vodka and the egg yolk until evenly combined and the mixture starts holding together.
- Press a little of the mixture between your fingers: if it holds together easily, there is no need to add more vodka. If it doesn’t, add 1/2 tbsp vodka and combine. The pastry should be soft but not sticky.
- Bring the pastry together with your hands and transfer to a lightly floured, cool benchtop. Lightly knead the pastry with your fingertips for about 30 seconds or until smooth and soft.
- Shape the pastry into a disc, wrap well in plastic wrap and place in the fridge for 20 minutes to rest.

Honey Fried Figs

Ingredients:
- 12 dried or fresh figs
- 2 tablespoons unsalted butter
- 2 tablespoons honey
- 2 tablespoons tawny port, Madeira, or other sweet, fortified wine, optional
- Ice cream, yoghurt, or whipped cream, optional
Instructions:
- Rinse the figs clean and pat them dry. Trim off and discard stems and cut the figs in half lengthwise. Set them aside.
- In a medium frying pan, melt the butter over medium heat. Add the honey and gently stir it into the butter.
- When the mixture is fully combined, set the figs cut-side-down in the honey-butter mixture and cook.
- Shake the pan now and again to keep the figs from sticking and spoon the honey-butter mixture over the tops of the figs until everything is bubbling and the figs are starting to brown, about 5 minutes.
- If using port, Madeira, or another fortified wine, remove the figs from the pan, and whisk in the wine.
- Once the wine is whisked in and a smooth sauce forms, let it simmer and bubble until thickened, about 2 minutes.
- Add the figs back to the pan and spoon the sauce over them, heating everything together.
- Serve the figs hot or warm, along with ice cream or topped with a dollop of yoghurt or whipped cream, if you like.
- Flambé Option : Don't remove the figs from the pan. Instead of port or Madeira, use brandy.
Take the pan off the heat and pour the brandy over the figs. Return the pan to the heat. If you have a gas stove, simply tip the pan a bit and the brandy should catch the cooking flame. On other stove-tops, use a long match or lighter to set the brandy on fire. As ever when working with a live flame, exercise extreme caution.
- Cook, shaking the pan a bit until the fire dies down (it will when the brandy has cooked off). Serve.
- How to Store : Store figs in their sauce in a tightly sealed container in the refrigerator for up to 5 days.
Source : Spruce Eats, https://www.thespruceeats.com/honey-fried-figs-2216328. Recipe not amended.

Rhubarb Snaps
Ingredients:
- 200g Fresh Rhubarb
- 100g Water
- 100g Caster Sugar
Instructions:
- Using a mandolin preferably, cut the rhubarb into lengthway strips 1mm thick and 8mm long.
- In a small shallow pan wide enough to fit 8mm, combine the water and sugar. Stir to dissolve as much as possible and then bring to boiling.
- Preheat a dehydrator to 47C.
- Reduce the heat, add the rhubarb strips and cook until they become translucent.
- Remove rhubarb, drain and set aside.
- Place the rhubarb strips separated from each other on the dehydrator wire tray. Set to dry over 24 hrs.
- Remove and let cool to room temperature. Transfer to an airtight container (with packets of silica or uncooked rice until needed).
Source : Heston Blumenthal’s Galette of Rhubarb recipe (from Heston’s The Fat Duck Cookbook). No alterations.

Hazelnut Butter & Coffee Meringues

Makes 24.
Note : Better not to double the recipe as the oven doesn't cope well with more than one tray at a time.
Prep time : 15 mins
Cook time : 30 mins
Ingredients:
- 1 Cup Raw Hazelnuts
- 1/4 tsp Salt
- 4 Egg Whites
- 1/8 tsp Cream of tartar
- 1/2 Cup Caster Sugar
- 3/4 Cup Pure Icing Sugar, sifted
- 2 tbsp coffee beans, crushed
Instructions:
- Roast hazelnuts, tossing once, until golden. Remove nuts from the oven.
- Once the hazelnuts have cooled, remove and discard their skins.
- Place roasted hazelnuts and a pinch of sea salt in a small food processor. Pulse until the nuts become liquid.
- Preheat oven to 95C. Line 2 baking trays with baking paper (very important!).
- In a large bowl, using an electric mixer, beat egg whites and cream of tartar for 1 minute until frothy.
- Gradually add granulated sugar, while beating, for about 5 mins until medium peaks form.
- Gradually add sifted icing sugar and beat for 8-10 mins until peaks are stiff and glossy.
- Add a few tablespoons of hazelnut butter to different spots in the meringue. Run spatula or knife through the meringue and hazelnut butter only once.
- With two tablespoons, carefully take a heaping spoonful of the mixture with both meringue and hazelnut butter. When placing it, delicately shape it so it is as high as possible on the baking tray (as meringues flatten as they bake).
- Top with a sprinkle of coffee beans and bake on the lowest part of the oven for 1.5 hours, then keep them in the oven until they cool completely to prevent cracks.
- Store in airtight containers at room temperature.

Meringues - Christmas Tree
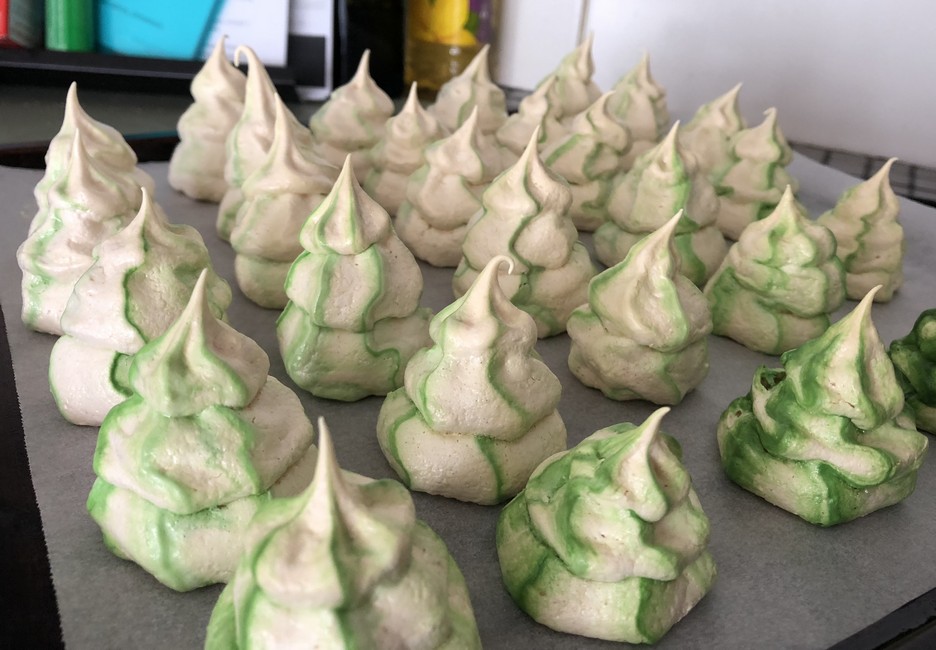
Crispy, chewy and pretty.
Makes 20 or 1 baking tray
Ingredients:
- 2 Egg whites, room temperature
- 1/2 Cup Sugar
- Green GEL Food Colouring (other liquid food colouring won't work)
- Rainbow stars and cookie ornamentation (optional)
Instructions:
- Preheat oven to 120C.
- Line a baking tray with parchment paper.
- In a large bowl, beat egg whites until soft peaks form.
- Gradually, add sugar, 1 tablespoon at a time. Beat until you can't feel the sugar graininess between your fingers.
- Prepare a piping bag with a medium 5 point star nozzle.
- Make 5 vertical lines with the green gel from the nozzle upwards to 3/4 up the bag until the twisting point.
- Spoon meringue mixture into the piping bag.
- Pipe meringues (about 4cm diameter) in three small upwards bursts, 2cm apart, on the lined tray, finishing with a peak like a christmas tree.
- Decorate meringues with stars and confectionery ornaments.
- Bake for 45 mins or until firm to the touch, whichever comes first. Turn off oven, leave door ajar and cool for 1 hour.


Variations :
- Halloween Ghosts
- Dust with Cinnamon for a delicious meringue

Strawberries with Crushed Lollies

An amazing tantalising sweet treat - Great for parties and big gatherings!
Ingredients:
- 1 Punnet of Strawberries (about 250g)
- 10-15 Hard Lollies
Instructions:
- Cut strawberries in half vertically, leaving on the strawberry leaves for effect.
- Blend the lollies lightly to get a granular (but not quite yet fine) sand with lots of crunchy bits.
- Dip each strawberry half into the lolly mixture to coat the sliced side.
- serve immediately.

Salted Almond Brittle
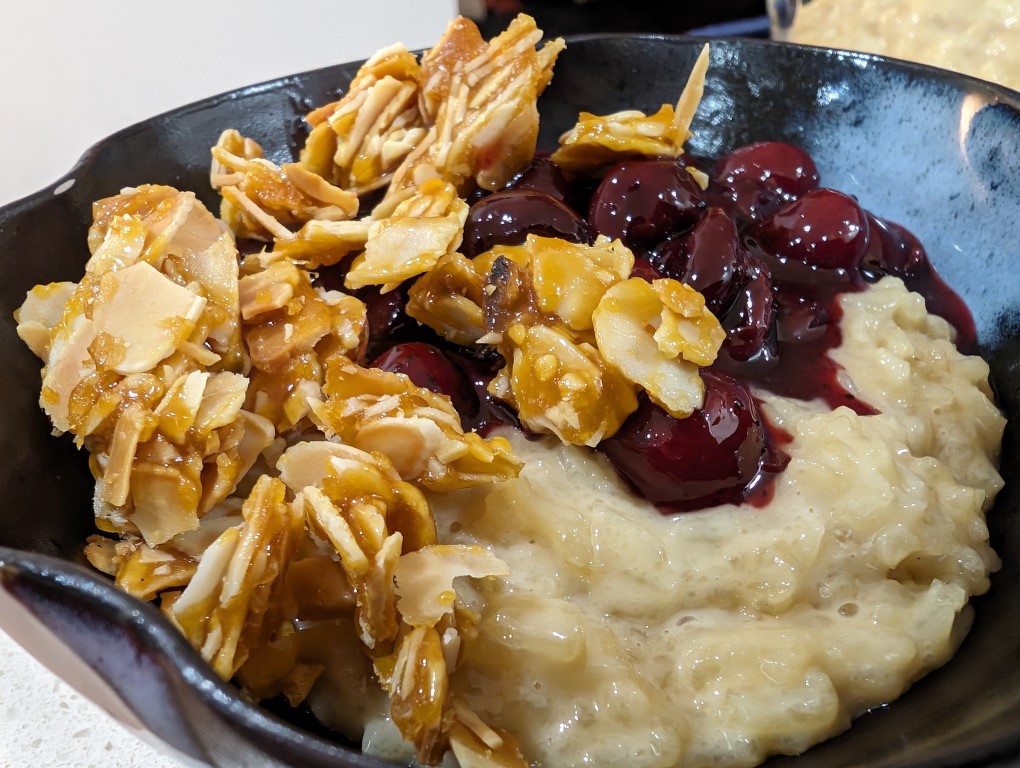
Amazing tasting and great as a topping for a dessert.
Ingredients:
- 100g flaked almonds
- 100g caster sugar
- 15g unsalted butter
- 1/2 tsp flaked sea salt
Instructions:
- Make the brittle. Preheat the oven to 160c and line a baking tray with parchment paper. Add the almonds to the tray and roast for about 15 minutes, stirring halfway through, until they are nicely toasted. Keep warm.
- Meanwhile, heat a small saucepan on medium high heat and, when hot, sprinkle in half of the sugar. Cook, stirring occasionally, until the sugar has melted and is starting to turn golden. Add the remaining sugar and cook, stirring occasionally, to a medium amber colour.
- Add the butter and whisk until fully combined. Take off the heat and add the warm almonds (keep the tray and paper) and salt and stir until they are evenly coated in the caramel, placing the pan back on the heat briefly if the mixture cools down too quickly. Transfer the mixture back to the tray and spread out a little. Set aside to cool.
- Once cool, roughly chop 75g of the brittle and set aside. The brittle can be kept in an airtight container at room temperature for up to two weeks.
Source : Ottolenghi. https://ottolenghi.co.uk/recipes/danish-rice-pudding-risalamande-with-salted-almond-brittle-and-sour-sumac-cherries. Recipe not amended.

Pistachio & Almond Brittle

Fast to make but need a candy thermometer.
Prep & cooking time : 30 mins
Ingredients:
- 150g Flaked almonds
- 270g Light Brown Sugar
- 120g Unsalted Butter
- 2 tbsp Boiling Water
- 1/4 tsp Sea Salt
- 1/2 tsp Bicarb Soda, sifted
- 40g Shelled Pistachios, very roughly chopped or left whole
Instructions:
- Roast the almond and, separately, the pistachios in the oven at 180C for 7 or so mins (note: pistachios brown faster, so take these out earlier. I also like to toss around the almond flakes to get them as golden brown as possible)
- Turn off the oven but leave them in to keep them warm (this helps to prevent the brittle from cooling down too fast).
- Line a lipped baking tray with baking paper. Place heat resistant padding between the baking pan and the countertop. Set aside.
- In a medium-sized deep saucepan, over low heat, melt butter, water and brown sugar, stirring lightly, until fully dissolved.
- Add candy thermometer, stop stirring and increase heat to med-high.
- Let the mixture bubble until the thermometer reads 140C, the soft crack stage. Keep a nose out for a burning smell. If you detect one and it is still very light, swirl the mixture a little to reduce the burning while keeping it near the heat. Really great critical to get as close to that 140C as possible.
- Turn off the heat, extremely quickly stir in flaky salt, bicarb soda and warm almonds.
- As soon as combined, pour mixture over the lined baking tray as spread out as possible, quickly tilting the tray to help it spread naturally (don't squash down the mixture as it will crystalize).
- Toss ontop roast pistachio and use the back of a wooden spoon to push them a little into the brittle.
- Let sit for an hour until room temperature.
- Use a large knife to cut the brittle into rough squares or rectangles.
- Store in an airtight container for up to a week.

Chinese Honey Walnuts (to serve with drinks or after dinner coffee)
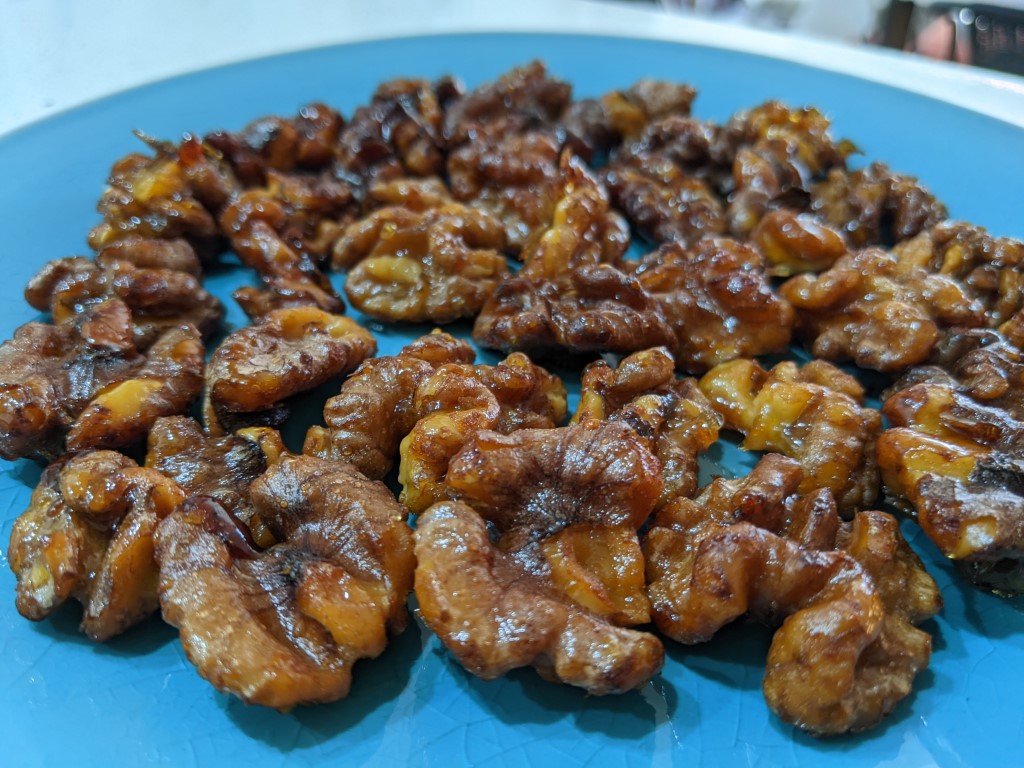
Ingredients:
- 250g Walnut Halves
- 3/4 Cup Honey
- 1 tbsp Lemon Juice
- 1 tsp Soy Sauce
- Caster Sugar
- Oil, for deep frying
Instructions:
- In a medium bowl, combine honey, lemon juice and soy sauce.
- Stir in walnuts. Set aside to marinate for 2hrs, stirring occasionally.
- Drain walnuts, toss in caster sugar, coating well.
- In a deep small sauce pan, heat oil until hot and cook walnuts in batches until just golden.
- Remove walnuts from pan, drain well.
- Serve with drinks or after dinner coffee.
Source : Chinese Australian Cookbook. No alterations.

Hazelnut & Almond Chocolate Crunchy Toffee

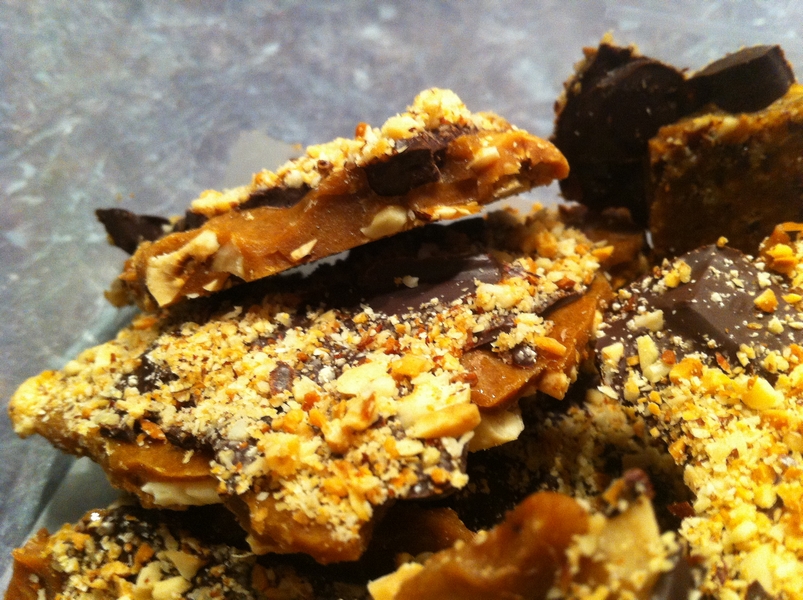
Prep Time : 30 mins
Prep + Wait time : 30 mins + 1 hour in the refrigerator
Makes 430 grams.
Ingredients:
- 1 Cup Roughly Chopped Hazelnuts
- 1 Cup Roughly Chopped Almonds
- 1 ¼ Cups firmly packed light brown sugar
- 2 tbsp Water
- 1/2 cup Unsalted Butter, divided
- 1 tbsp Light Corn Syrup (Golden Syrup)
- 1 tsp Vanilla Extract
- 1/4 tsp Baking Soda
- 170g Semi-Sweet Chocolate, coarsely chopped
Instructions:
- Toast chopped almonds and hazelnuts on the top shelf of an oven preheated to 350F for 8-10 mins or until golden brown and fragrant. Set aside to cool.
- Line a 8 x 10 inch pan with baking paper. Lightly coat the foil with cooking spray, then with half the chopped hazelnuts and almonds and set aside.
- Butter the sides of a large heavy saucepan with 2 tsp of butter.
- Cube remaining butter and place in the pan.
- Add brown sugar, water and corn syrup.
- Have the Baking Soda and vanilla extract at the ready to use immediately when needed.
- Bring mixture to a boil, stirring to dissolve the sugar with a wooden spoon only. Then cover the pan with a lid for about 1 min to allow the sides of the pan to wash themselves down and dissolve any remaining sugar crystals.
- Remove lid and clamp in a candy thermometer, making sure it is one that does not touch the bottom of the pan and cook, without stirring, until mixture turns reaches 285F/140C (soft crack stage).
- Immediately remove from the heat as the mixture’s temperature continues to rise to 290F/145C. Add the Baking Soda and Vanilla Extract and stir to combine.
- Immediately pour hot mixture onto prepared pan over hazelnuts. Spread evenly quickly, if needed.
- Sprinkle chopped chocolate evenly across the hot toffee. (It will melt)
- After a few minutes and the chocolate has started to melt (5mins or so), spread the chocolate evenly across toffee and then sprinkle the remaining chopped hazelnut and almonds over the chocolate / toffee mixture.
- Let stand at room temperature for about ten minutes until cool, then in the refrigerator for about 1 hour.
- Break into bit-sized pieces. Store in a dry container in the refrigerator for up to 10 days.

Toffee Candied Nuts
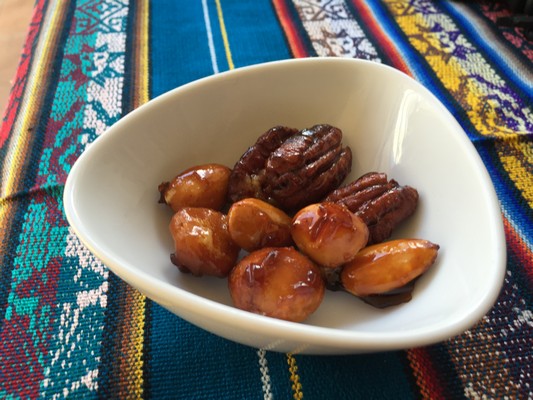
Amazingly delicious treat!
Ingredients:
- 200g Nuts (any type)
- 1 tsp Salt
- 1.5 Cups Pure Icing Sugar, sifted
- Canola oil for frying
- For next time : Keen to try variations by adding spices to the icing sugar for flavour
Instructions:
- Prepare a large mixing bowl with the sifted icing sugar. Set aside.
- In a large soup pot, boil 4 cups of water and the tsp of salt.
- Blanch the nuts in the salted boiling water for about a minute. Strain.
- Place blanched nuts into the sifted icing sugar and toss to coat thoroughly until they resemble little snowballs.
- Prepare wok with oil for deep frying. Heat oil to 160C.
- Carefully place the nuts in the hot oil and cook for 5-8 mins until the nuts start to float.
- Immediately take the floating nuts out of the oil with a slotted spoon and place them on a rack, ensuring they are kept separated while cooling.
- Once cooled to room temperature, they are ready to eat!
- Store in an airtight container in a cool place for up to a week.

Brazilian Caramels (Brigadeiros)
Makes 20 small bite sized caramels
Cooking 20 mins + 10 mins prep
Gluten Free
Ingredients:
- 3 tbsp Unsweetened Cocoa Powder
- 1 tbsp Unsalted Butter
- 1 Can (395g) Sweetened Condensed Milk
- 150g Hazelnuts, roasted, skins removed, ground to a powder
- 2 tbsp Vegetable oil
Instructions:
- Place the cocoa powder, butter and condensed milk in a saucepan over medium heat.
- Cook, stirring constantly, for 10 mins or until mixture starts to come away from the sides of the pan.
- Remove from the heat and allow to cool.
- When cool enough to handle, using your hands and a half tsp of vegetable oil to prevent sticking, shape mixture into macadamian nut-sized balls.
- Roll in ground roasted hazelnuts. Then move to a tupperware dish, lined with baking paper.
- Eat immediately or place in the fridge to chill until ready to serve.
- Stores in an airtight container for up to 1 week.

Miso Brazilian Caramel Brigadeiros in Toasted Nuts
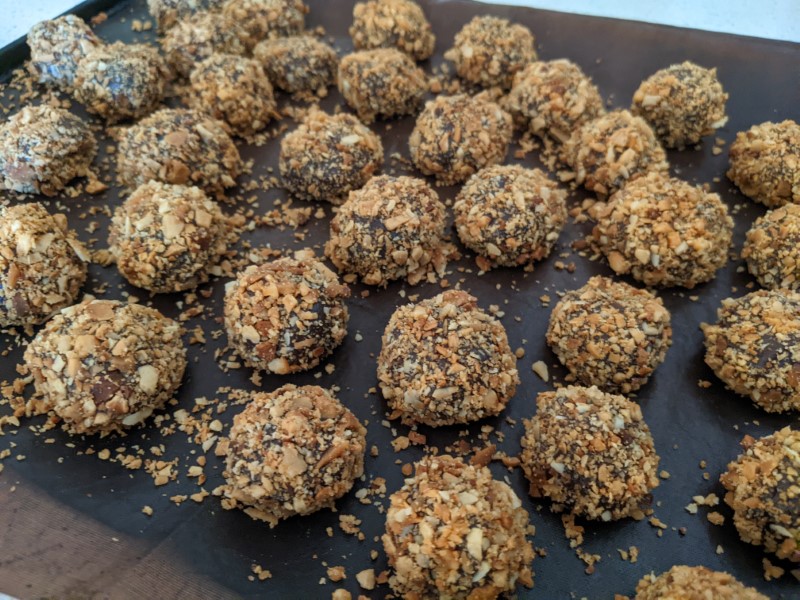
Ingredients:
- 1 x 400 g can condensed milk
- 4 tbsp cocoa powder, sifted
- 2 tbsp white miso paste
- 1 tbsp butter
- 1 cup peanuts or cashews, toasted and chopped to small crumbs
Instructions:
- In a small saucepan, heat all the ingredients.
- Continuously mix to avoid sticking or burning (cook for some time as the longer you cook it the more firm the caramel ball becomes) and then set aside to cool.
- Place the crumbed toasted nuts in a small bowl, ready for rolling.
- Once the mixture has cooled, take a heaped tsp of the miso batter and roll them into balls to the size of your choosing. Roll them in the nut crumb and then pop them on a tray.
- Leave them in the fridge until it’s time to serve (or in the freezer if you want to keep them for longer).
Source : https://www.sbs.com.au/food/article/2022/05/31/five-recipes-call-miso

Bourbon Sea Salt Caramels
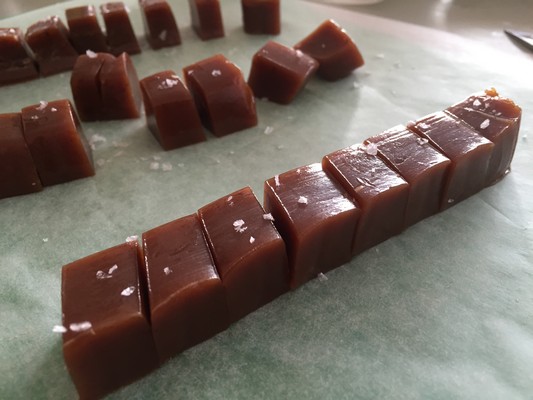
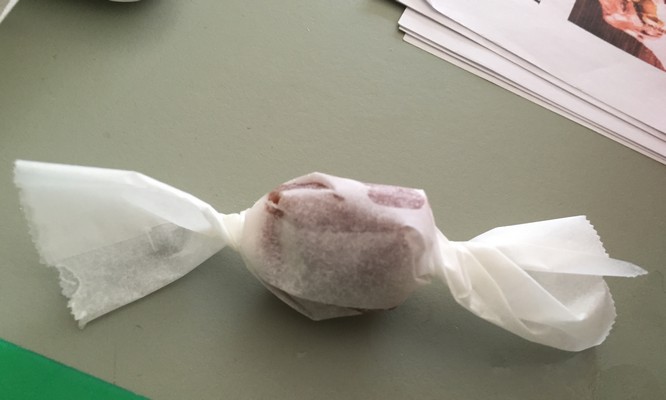
Makes about 50 caramels.
Ingredients:
- Non stick vegetable oil spray (preferably Canola as it doesn't have a strong flavour)
- 2 Cups Sugar
- 1/2 Cup Light Corn Syrup
- 14-Ounce Can Sweetened Condensed Milk
- 1/2 Cup Unsalted Butter, diced into 1-2cm cubes
- 2 tbsp Bourbon (Very subtle bourbon taste... maybe use essence or try 3 tbsp)
- 1/2 tsp Salt
- 1-2 tsp flaky sea salt for decoration (eg Maldon)
- 1 tbsp canola or vegetable oil
Special Equipment:
- Candy thermometer
- Baking paper
Instructions:
- Grease and line a 20x20cm non-stick baking tray with baking paper (including sides, leaving an overhang over the sides to help to remove the caramels). Lightly spray
baking paper as well.
- In a medium saucepan, over medium-high heat, combine sugar, corn syrup and 1/2 cup of water. Bring it to a boil, while stirring with a wooden spoon until the sugar has dissolved.
- Cook for 8-10 mins, swirling pan occasionally, until mixture turns a deep amber colour.
- Remove pan from heat. Whisk in the condensed milk and butter (warning : mixture will bubble and steam vigorously). Mix until smooth.
- Fit pan with a candy thermometer and return to medium-low heat.
- Cook, whisking constantly, until the mixture reaches 240F.
- Remove from heat and whisk in bourbon and the 1/2 tsp salt until just combined.
- Pour mixture in prepared pan. Let cool on countertop for 30 mins until room temperature.
- Then chill in the freezer for 15-30 mins until quite firm. This makes the caramel easier to cut.
- Meanwhile, cut several long strips of baking paper 10cm wide. Then cut each strip 10cm to make a square. These will be used to wrap the caramels.
- Remove pan from freezer, then remove the caramel as a block from the pan.
- Place canola or vegetable oil in a small bowl. Take a long kitchen knife and lightly grease the knife with some oil.
- Cut a 1.5cm long strip of caramel from the block of caramel.
- Place the remaining caramel block back in the pan and the pan back in the freezer to keep it firm.
- Sprinkle caramel strip with sea salt and cut the strip into 2cm long segments.
- Take a 2cm segment and place it in the middle of a baking paper square. Fold paper around it to create a tube with the caramel inside. Then slowly twist the two ends in two different directions (one will work easily, the other will be a little tricky but you'll get used to it).
- store the wrapped candy in the fridge and keep cool until 20 mins before they ready to share where you should bring them to room temperature.
- Caramels keep for up to 2 weeks when stored in an airtight container in the fridge.

Passionfruit Soft Jelly Candy
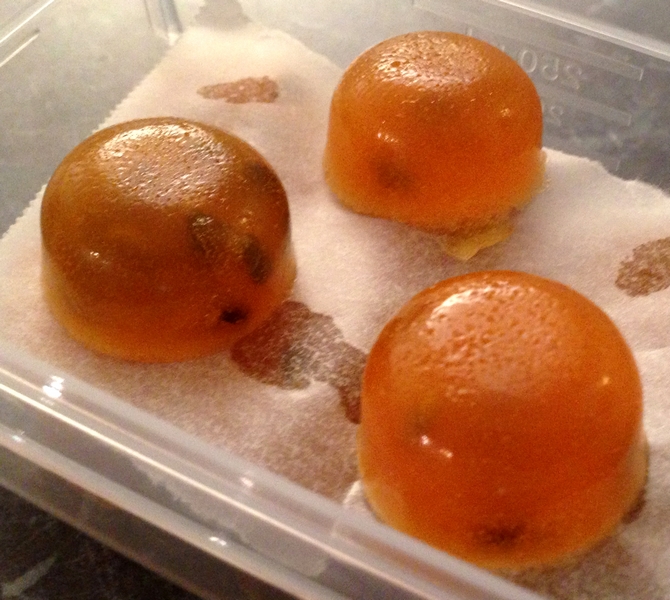
Ingredients:
- 500g Passionfruit pulp (approx. 15 passionfruit), with the seeds sifted out
- 250g Sugar
- 100g Glucose syrup
- 15g Lemon Juice
- 1/2 Cup Cold Water
- 4 tbsp Gelatin Powder
Instructions:
- Spray and line a square baking tin with non-stick paper (cut out a square and place it at the base if possible).
- Place cold water in a small bowl and sprinkle over gelatin.
- Combine sugar, sifted passionfruit pulp, and glucose and heat on medium until sugar dissolves and mixture reaches 108C.
- Remove from the heat and stir in lemon juice and gelatin mixture, until gelatin has melted through.
- Pour in to prepared pan and leave to set in the fridge for a few hours (preferably overnight).
- Once set, cut into cubes and serve. As an option after unmoulding, roll in additional sugar for a sugary coating. For added flavour, mix the sugar with orange or lemon zest.

Lollipops
Serves Lots
Ingredients:
- 1/3 Cup Light Corn Syrup
- 1 Cup Granulated Sugar
- 1/3 Cup of Hot Water
- 1/2 tsp Liquid Food Colouring
- 1/2 tsp Flavouring (Liquid Extract, etc)
- Vegetable Oil
Instructions:
- Combine sugar, hot water and corn syrup in a heavy saucepan. Place on high heat and stir with a wooden spoon until all sugar crystals are dissolved.
- Continue cooking without stirring to 290 F, then remove from heat. Should take about 10 mins.
- Add colouring and flavouring, as desired.
- Lightly grease a candy mold that can take the heat with a little vegetable oil.
- Pour mixture in the molds and let harden at room temperature (about 10 mins). Unmold and lay on paper towel to absorb the oil.
- When completely cool, wrap tightly in plastic wrap until ready to use. Store at room temperature for up to 6 weeks.

Fruit Roll-ups
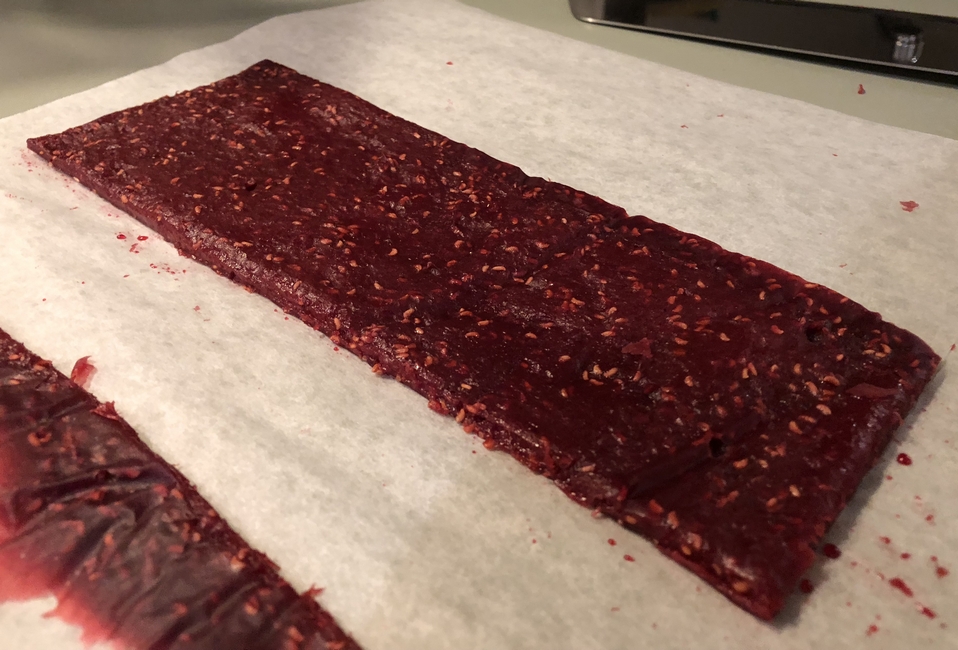
A recipe from Laurie Green at Crop Swap Australia.
Ingredients:
- 1.5 cups Frozen Raspberries
- 1.5 cups Banana, chopped
- 3 tbsp Honey
- 1 tbsp Lemon Juice
- (Any combo of fruit could also work eg. apple & cinnamon, mango & pineapple, etc)
Instructions:
- In a saucepan, over low heat, combine raspberries and bananas until raspberries are melted.
- Stir in honey and lemon juice. Cover with a lid.
- Continue to cook until thickened and the fruit have fully softened.
- Remove from the heat and let the mixture cool.
- Add to a food processor and blend until completely smooth.
- Spread the mixture onto a dehydrator sheet (try the sheet with small holes and place a tray with baking paper underneath to catch any drips). Ensure the thickness is as even as possible up to a few cms thick.
- Dehydrate at 65 degrees for 6-11 hours.
- Rotate the trays if needed to keep the drying even.
- You will know when it's done when the mixture is tacky but not sticky. It should be flexible as well and not hard.
- Once done, peel the roll ups off the sheet and cut into strips. Top with baking paper and store in an airtight container.
Source: https://www.cropswap.sydney/crop-swap-sydney/homemade-fruit-leathers/ (Laurie Green)

Dehydrated Rhubarb Candy Chews
Ingredients:
Instructions:
- Clean the rhubarb stalks. Then chop them in half lengthwise and then in 3cm long sticks
- Place on a dehydrator tray.
- Set dehydrator to 55-60C for 11 hours or so until dried.
- When done, let cool to room temperature gradually then store in an air tight container.
Source: https://www.pinterest.com.au/pin/276971445812942419/

Chocolate Cream Cheese Frosting
Ingredients:
- 2 tablespoons softened butter
- 2 small packages (3 ounces each) cream cheese, softened
- 1 pound confectioners' sugar
- 2 ounces unsweetened chocolate, melted
- 1 to 2 tablespoons milk
- 1 teaspoon vanilla
Instructions:
- Cream butter and cream cheese.
- gradually add part of the sugar, alternating with chocolate then milk, until well blended and spreading consistency is reached.
- Beat in 1 teaspoon vanilla.
- Frosts 2 9-inch round layers.

Vietnamese Faux-Pomegranate and Coconut Milk Sweet Cold Soup
Ingredients:
- 15 Water Chestnut, peeled and diced (canned water chestnut is absolutely fine)
- Red Food Colouring
- 100g Tapioca or Corn Starch
- 80g White Sugar
- 1 Can Coconut Milk
- Shaved ice, to serve (optional)
Instructions:
- Stir a little red food colouring into about 2 cups of water.
- Soak the diced water chestnuts in this water until they turn pink, about 10-15 mins. Drain.
- Coat the dyed water chestnuts thoroughly in tapioca starch. Discard the leftover starch.
- Bring a pot filed with water to a boil, add the coated water chestnuts into boiling water and cook until they float, then transfer them to a bowl of cool water. Set aside for 15 mins then drain.
- Meanwhile, combine sugar, coconut milk and half a cup of water in a small pot, put over medium heat and bring to a boil. Cook for another 10 mins. Remove and let cool.
- Divide the water chestnut into serving cups, fill the cups with the coconut milk mixture, add shaved ice and then add 2-3 tablespoons of the dyed water chestnuts. Serve at room temperature or cool.

Indonesian Pandan Crepes with Caramelised Coconut (Kuih Dadar)
Serves 4.
Ingredients:
- 1/3 Cup Plain Flour, sifted
- 2 Eggs
- 1/4 Cup Milk
- 1/4 tsp Pandan Paste or Essence
- 1/2 Cup (125ml) Coconut Milk
- Canola Oil Spray
- 1/2 Cup (125ml) Coconut Cream
- 100g Dark Palm Sugar, coarsely grate
- 1 Cup (90g) Dessicated Coconut (preferably Moist Coconut Flakes if you can find them)
Ingredients for Salty Coconut Custard:
- 1 Cup (250ml) Coconut Cream
- 1/4 Cup Caster Sugar
Instructions:
- Start with the crepe batter. Whisk the flour, eggs, milk and a large pinch of salt until smooth.
- Add the pandan paste and an initial dash of the coconut milk, then whisk until combined.
- Gently stir in the remaining coconut milk using a ladle.
- The mixture should be quite watery - if you have the correct consistency, the batter will split into droplets when poured from the ladle in a slow stream. If it forms a smooth band of liquid as it is poured from the ladle, you'll need to add a little more milk.
- Heat a large frying pan over medium heat and lightly spray pan with oil spray.
- Pour 2 tbs of the crepe batter into the pan, swirling to coat the base to create a thin crepe. Cook for 1 min until set.
- Carefully flip and cook for a further 20 seconds or until tinged golden. The crepe should be thin enough to see through it.
- Repeat with remaining batter to make 8 crepes (no need to add any further oil to the pan). Set the crepes aside.
- To make the caramelised coconut filling, place the coconut cream, palm sugar and a pinch of salt in a small saucepan .
- Stir over medium heat until sugar dissolves.
- Add dessicated coconut and cook, stirring, for a further 3 mins until the mixture is sticky and the liquid is all absorbed.
- Remove from heat and spread out coconut mixture on a plate to cool.
- To assemble crepes, spoon 1-2 tbsp of cooled coconut filling down the centre of each crepe.
- Fold the crepes in half over the filling, then fold in the 2 sides and roll up to form long parcels.
- To make the coconut custard, combine the coconut cream, caster sugar and 1/4 tsp salt in a small saucepan over medium-low heat and cook, while stirring for 4 mins until the sugar dissolves.
- Serve warm or at room temperature topped with the coconut custard.
Whiskey Cake
Serves 6
Ingredients:
- 1 Box Deluxe Yellow Cake Mix with pudding in it (Pillsbury, for instance)
- 1 3oz small box of instant vanilla or French vanilla pudding.
- 4 Eggs
- 1/2 Cup Oil
- 1 Cup Milk
- 1/3 Cup Whiskey
- 1 1/2 Cup Chopped Walnuts
- Topping: 1 Cup Butter, 3/4 Cup Sugar, 3/4 Cup Whiskey
Instructions:
- Mix all the CAKE ingredients together except the nuts.
- Mix until smooth and well blended. Add the nuts and stir.
- Pour batter into 3 loaf cake pans greased with butter. Bake at 350 F for 30-40 mins.
- While cake is cooking make topping. Melt butter over low heat. Add sugar and whiskey and stir until sugar is dissolved and mixture just begins to boil. Remove from heat and pour immediately over the cakes. Do not allow topping to continue to boil uncovered; whiskey will evaporate! Pour topping over cakes as soon as they come out of the over. Pour slowly so all the topping does not run immediately to the bottom of the pan.
- Let cake soak in topping for at least 2 hours before removing from the pan. Also, you can just leave it in the pan until you serve them -- that way they can really soak!
Source: Anneliese Germain, 1989


